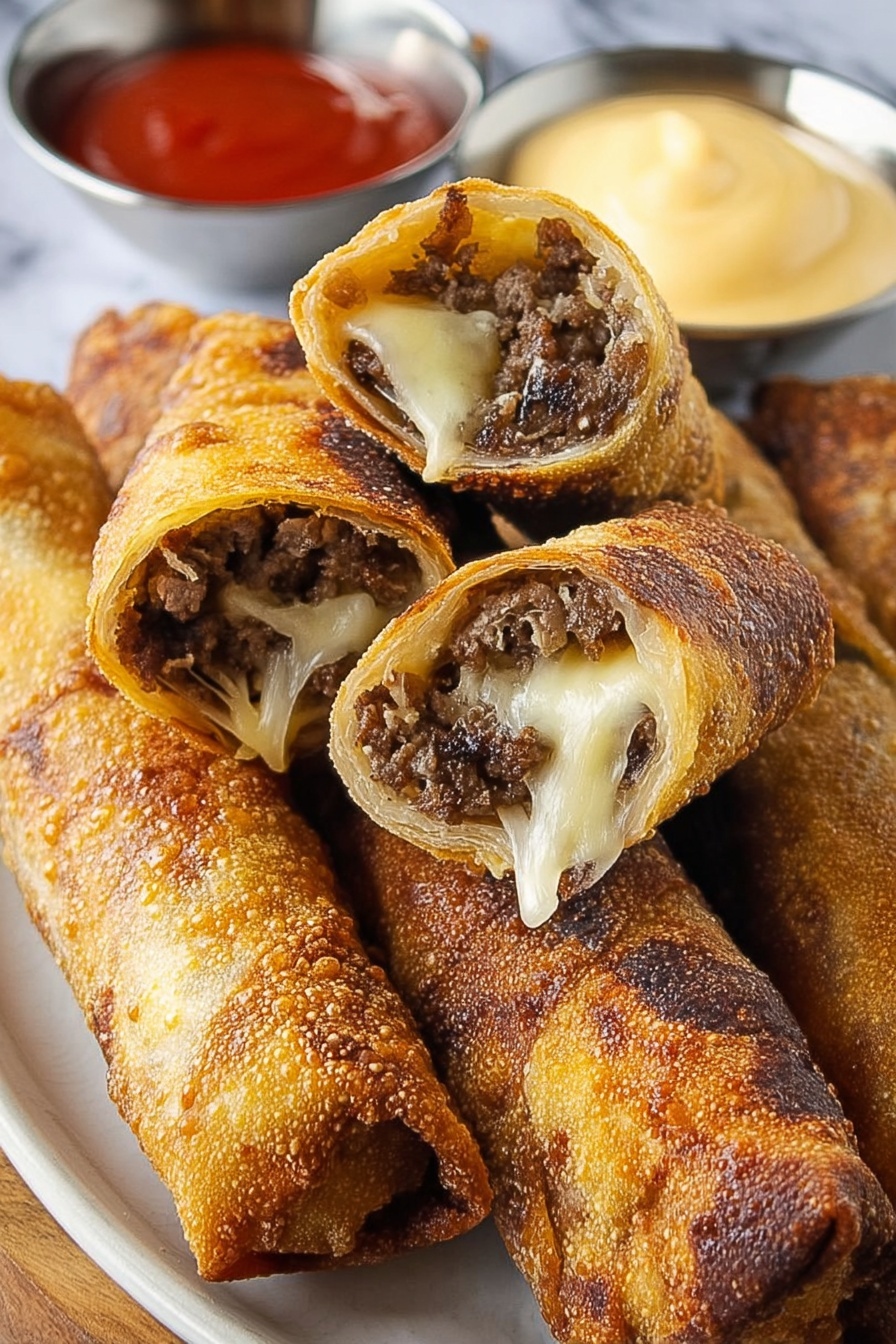
Cheeseburger Spring Rolls Recipe might just change the way you think about both cheeseburgers and spring rolls. Imagine all that juicy, cheesy goodness wrapped in a crunchy, golden shell—it’s a total game-changer. Let me walk you through this fun, crowd-pleasing recipe that’s easier to pull together than you might expect.

Jump to:
Why You'll Love This Recipe
These spring rolls take comfort food to a whole new level. I first tried making them for a casual game night, and trust me, they vanished fast. The combo of familiar cheeseburger flavors with that crave-worthy crunch is seriously addictive.
- Ultimate Flavor Mashup: All the classic cheeseburger tastes wrapped up in a crispy, handheld snack.
- Made From Scratch but Easy: You control every ingredient, and it’s surprisingly quick once you get rolling.
- Super Versatile: Perfect as an appetizer, party food, or even a fun weeknight dinner.
- Fun to Make with Others: Wrapping these becomes a great hands-on activity for family or friends.
Ingredients & Why They Work
The magic here is in the balance—juicy beef, melty cheese, and tangy pickles all wrapped in crisp spring roll skins. Each ingredient adds a layer of that iconic cheeseburger flavor, and I always keep an eye out for quality basics to make them shine.
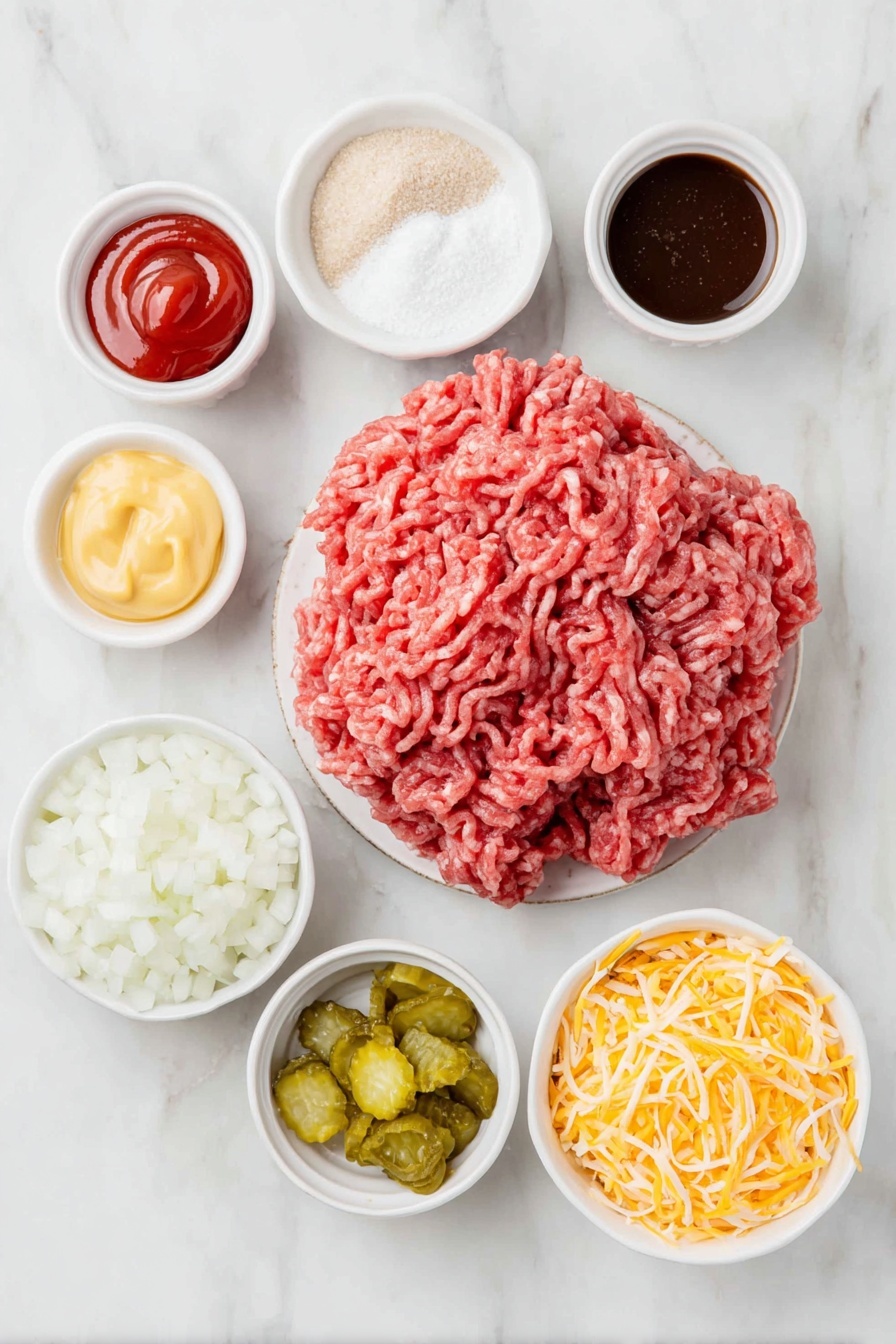
- Ground beef: I prefer 80/20 for the best mix of flavor and juiciness—I find leaner beef dries out the filling.
- Onion: Finely diced for subtle sweetness and texture without overpowering.
- Ketchup: Adds that familiar tangy-sweet depth every cheeseburger needs.
- Yellow mustard: A must for that sharp, classic zing—don’t skip it!
- Worcestershire sauce: A small splash amps up umami and complexity.
- Garlic powder & onion powder: Secret flavor boosters that round out the savory profile.
- Kosher salt and black pepper: To season perfectly and balance flavors.
- Shredded cheddar or American cheese: Melts beautifully for gooey, cheesy pockets.
- Dill pickles: Finely chopped for that punch of acidity and crunch inside the roll.
- Spring roll wrappers: Thin, yet sturdy, they crisp up flawlessly—be sure they’re thawed if frozen.
- Flour and water paste: Simple glue to seal edges tight and prevent leaks.
- Oil for frying: Use vegetable or peanut oil for nice browning without overpowering taste.
Make It Your Way
I love tweaking this Cheeseburger Spring Rolls Recipe depending on who I’m feeding. Sometimes I add diced tomatoes, or swap cheddar for pepper jack to shake things up with some extra spice. Feel free to get creative!
- Variation: Once, I used turkey instead of beef for a leaner twist, and with a bit more mustard, it was just as tasty.
- Vegetarian option: Try finely chopped mushrooms and lentils with the seasonings for a meaty texture without the beef.
- Air fryer friendly: Perfect for a healthier version—I actually make these this way on busy weeknights to save time and mess.
Step-by-Step: How I Make Cheeseburger Spring Rolls Recipe
Step 1: Cook that Beef and Onion to Perfection
Start by heating your skillet over medium-high heat. Toss in the ground beef and finely diced onion, cooking until the beef browns nicely and the edges get crispy—about 5 to 7 minutes. This gives such great flavor depth. Don’t forget to drain all the grease after cooking; you want the filling flavorful but not greasy.
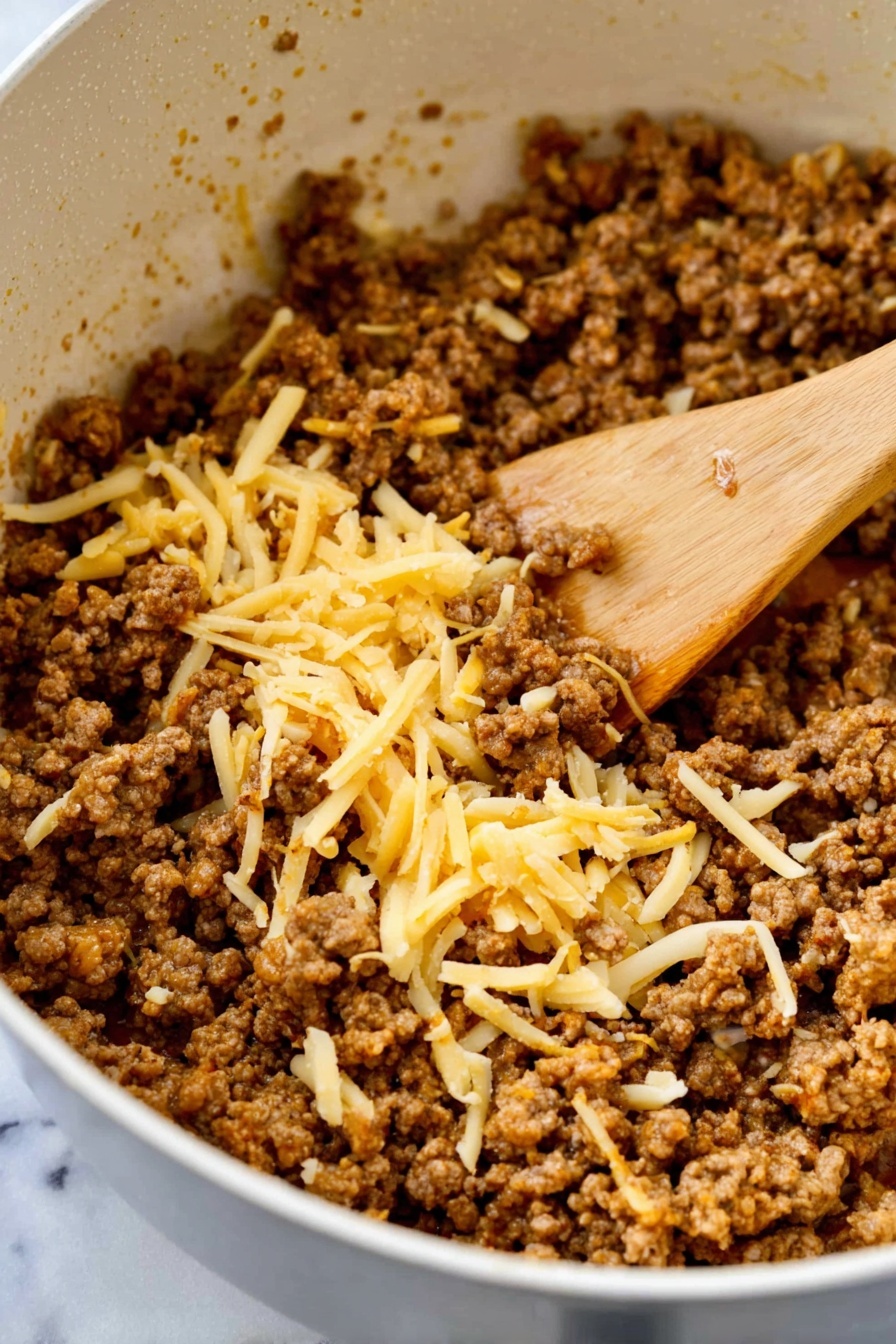
Step 2: Bring on the Flavor Mix
While the cooked beef mix is still warm, stir in ketchup, yellow mustard, Worcestershire sauce, garlic powder, onion powder, salt, and black pepper. Let it cool for about 5 minutes—this helps when adding cheese so it doesn’t melt too fast inside the rolls. Then fold in your shredded cheese and chopped pickles, mixing them evenly.
Step 3: Wrapping the Rolls
Keep your spring roll wrappers under a damp towel so they don’t dry out. Place about 2 tablespoons of filling in the center, fold sides inward, and roll up tightly like a burrito. Use the flour and water paste to seal the edges well—this step is vital to keep them from opening during frying. Trust me, a tight roll makes all the difference.
Step 4: Fry or Air Fry to Crispy Goodness
Heat about 2 inches of oil to 350°F if frying. Cook 3 or 4 rolls at a time, turning gently for 3 to 4 minutes until golden brown. Drain on paper towels. If you prefer air frying, spritz the rolls lightly with oil and air fry at 390°F for 10 to 12 minutes, flipping halfway through. Both methods work great — I’ve done plenty of batch testing!
Top Tip
From diving into this Cheeseburger Spring Rolls Recipe many times, I’ve learned that a few small tricks really make it shine and keep your kitchen stress-free.
- Keep Wrappers Covered: Dry wrappers crack easily—always keep them under a damp towel as you work.
- Don’t Overfill: Using about 2 tablespoons of filling ensures easy rolling and prevents bursting during frying.
- Seal with Flour Paste: This cheap glue holds the rolls tight way better than water alone.
- Oil Temperature Matters: Using a thermometer helped me avoid greasy or burnt rolls—keep it steady around 350°F when frying.
How to Serve Cheeseburger Spring Rolls Recipe
Garnishes
I love serving these with a swirl of ketchup mixed with mayo right alongside some sweet chili sauce paired with a bit of sour cream. The sauces bring out the cheeseburger vibe perfectly, and a sprinkle of finely chopped fresh chives or green onions adds a nice fresh punch.
Side Dishes
These spring rolls pair amazingly with simple sides like crispy French fries, a crisp green salad with a tangy vinaigrette, or even some homemade coleslaw. The freshness balances the richness of the rolls nicely.
Creative Ways to Present
For parties, I like arranging the rolls on a platter with little dipping cups decorated with pickles and mini cheese slices for a fun cheeseburger-themed spread. Another favorite is stacking them upright in a tall glass or mason jar for a playful twist that grabs attention.
Make Ahead and Storage
Storing Leftovers
Once cooked, store leftover spring rolls in an airtight container in the fridge for up to 2 days. Reheat in the air fryer or oven to keep them crispy—I avoid microwaving because it softens the wrapper.
Freezing
I usually freeze uncooked rolls on a parchment-lined tray, then transfer them to a zip-top bag once solid. You can cook them right from frozen—just add a couple of minutes to your frying or air-frying time. This makes prepping ahead super simple.
Reheating
To reheat, pop the rolls in an air fryer at 350°F for about 5 minutes, flipping halfway, or bake in a preheated oven at 375°F until warmed through and crispy. This keeps that perfect crunchy crust intact.
Frequently Asked Questions:
Absolutely! Cheddar or American cheese work best for their meltiness and classic cheeseburger flavor, but feel free to try pepper jack for a little kick or mozzarella for a milder taste. Just make sure the cheese melts well.
Yes, air frying is a fantastic healthier alternative. It crisps the rolls perfectly with much less oil. Just spritz the rolls lightly with oil before air frying at 390°F for 10-12 minutes, flipping halfway through.
You’ve got options! You can assemble the rolls ahead of time and keep them wrapped tightly in the fridge for up to a day, or freeze the uncooked rolls for longer storage. Cooking from frozen just adds a few extra minutes to your cook time.
Classic ketchup and mayonnaise mix is always a hit, but I also love a combo of sweet chili sauce with a dollop of sour cream. Both bring out the flavors beautifully and offer different taste profiles depending on your mood.
Final Thoughts
If you want a fun twist on a classic, this Cheeseburger Spring Rolls Recipe is where it’s at. It’s one of those dishes that sparks smiles and conversations every time I make it. Whether for a casual night in or your next party, you’ll enjoy how impressively easy it is to bring these to the table—and even more how quickly they disappear. Trust me, once you try it, it’ll become a go-to in your recipe stash.


Leave a Reply