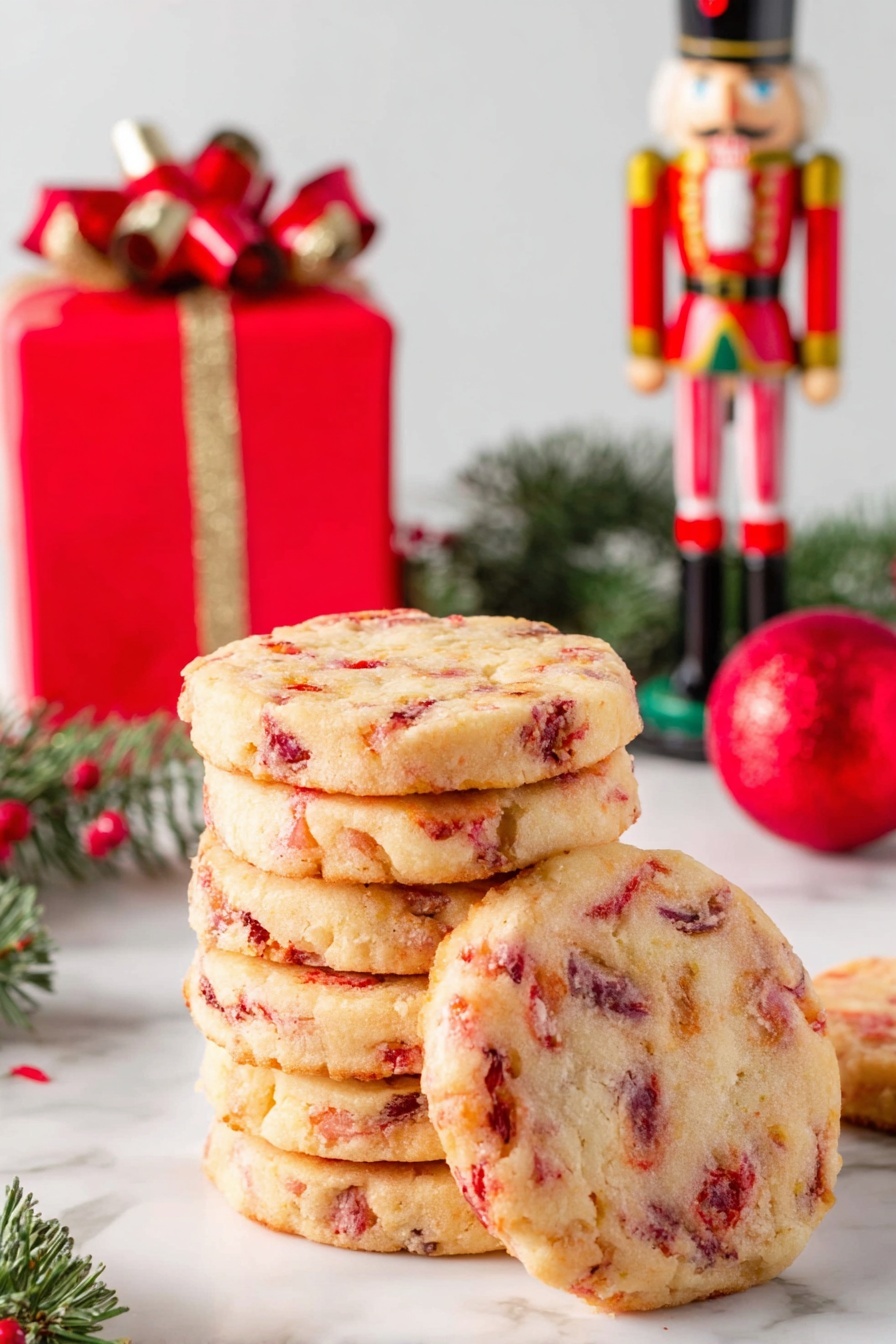
Nothing says holiday cheer quite like the sweet, colorful burst of fruit in a crisp cookie. This Cherry Christmas Cookies Recipe combines buttery dough with vibrant red and green candied cherries, making each bite festive and full of texture. It’s a classic treat that brings warmth and joy to any cookie platter during the holidays.

Jump to:
Why You'll Love This Recipe
I’ve been making this Cherry Christmas Cookies Recipe since I was little, and honestly, it’s something I pull out year after year because it never fails to impress. The cherries are sweet, the nuts add a lovely crunch, and the buttery dough melts in your mouth. These cookies are perfect for sharing with family or gifting to friends.
- Timeless holiday flavor: Cherry and nut combinations are classic and instantly evoke Christmas vibes.
- Simple ingredients, big impact: No fancy tools or hard-to-find ingredients here—just what you've likely got on hand.
- Easy to prep ahead: Chilling the dough means you can make them in advance, freeing up your holiday day.
- Beautiful and colorful: Those red and green candied cherries make these cookies instantly festive and eye-catching.
Ingredients & Why They Work
Each ingredient plays an essential role in crafting the cookie’s texture and flavor. The mix of butter, powdered sugar, and flour creates a soft, slightly crumbly base, while the nuts add crunch, and the candied cherries bring bursts of fruity sweetness and beautiful color. Use fresh-sounding ingredients for the best results.
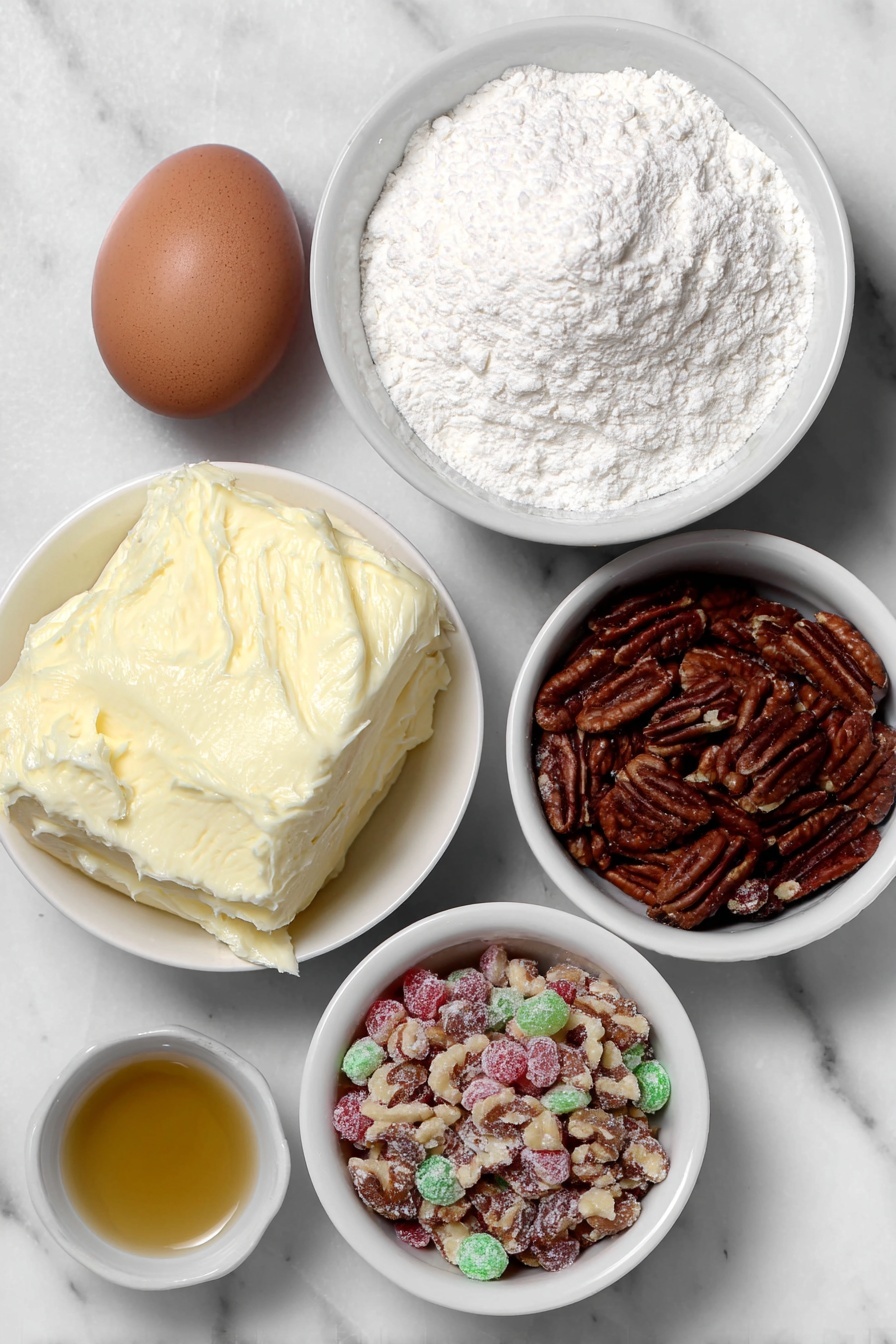
- Butter: Softened butter provides richness and a tender crumb—don't use margarine or shortening for that authentic texture.
- Powdered sugar: It ensures the dough is smooth and delicate, giving a melt-in-your-mouth finish unlike granulated sugar.
- Egg: Adds structure and helps bind everything together without making the dough heavy.
- Vanilla extract: A small addition, but it rounds out the flavors and adds warmth.
- Flour: All-purpose flour is perfect for this recipe—it holds the cookies together while keeping them tender.
- Chopped nuts: I like walnuts or pecans for their flavor and crunch, but almonds work well too.
- Candied cherries: The stars of the show! Use a mix of red and green for that festive holiday look, and quarter them so they distribute evenly.
Make It Your Way
One of my favorite things about the Cherry Christmas Cookies Recipe is how you can tweak it easily to suit your taste—or to fit what you have on hand. Whether that means swapping out nuts or experimenting with different extracts, it’s all about making the recipe feel like yours.
- Nut-Free Variation: When I made these for a friend with allergies, I simply left out the nuts and added a touch more cherries—still delicious and festive!
- Spiced Cherry Twist: Adding a pinch of cinnamon or a sprinkle of nutmeg into the dough adds a cozy, seasonal hint that pairs beautifully with the cherries.
- Chocolate Drizzle: I sometimes drizzle melted dark chocolate over cooled cookies for an extra indulgent touch—it’s always a crowd-pleaser.
- Mini Cookies: Slice the dough thinner than recommended to create bite-sized cookies perfect for parties or gifting.
Step-by-Step: How I Make Cherry Christmas Cookies Recipe
Step 1: Creaming the Butter and Sugar
Start by softening the butter to room temperature. I like to give it about 30 minutes out of the fridge, so it mixes easily without melting. Beat the butter together with the powdered sugar until it's light and fluffy—this step creates the buttery base that gives the cookies their tender texture. A few extra minutes here really makes a difference!
Step 2: Incorporate the Egg, Vanilla, and Flour
Next, add the egg and vanilla extract, mixing gently until smooth. Then, slowly add the flour—doing this gradually helps prevent lumps and maintains a soft dough. Be careful not to overmix at this point because you want the dough to stay tender and not tough.
Step 3: Folding in Cherries and Nuts
Now for the fun part—folding in the quartered candied cherries and chopped nuts. Take your time here to distribute them evenly throughout the dough. The cherries can get sticky, so using a rubber spatula or wearing gloves can help keep your hands clean.
Step 4: Shaping and Chilling the Dough
Divide the dough into three equal parts. On a piece of parchment or waxed paper, roll one portion into a 2-inch round log shape. Wrap it tightly in the paper, twisting the ends like a candy wrapper, and refrigerate. Repeat with the other two portions. I’ve found that chilling the dough for at least 3 hours makes slicing it a breeze and keeps the cookies from spreading too much during baking.
Step 5: Slicing and Baking
Once chilled, unwrap the logs and cut them into ¼ inch slices with a sharp knife. Place each slice on a baking sheet lined with parchment paper, spacing them about an inch apart. Bake at 350°F for 13–15 minutes or until the edges are just turning golden. Keep an eye on them so they don’t overbake—these cookies are best slightly crisp on the outside but tender inside.
Top Tip
Over the years, I’ve learned that small details really boost this Cherry Christmas Cookies Recipe. Here are the best tips I can share to help you nail this classic every time:
- Softened Butter is Key: Don’t rush this step. Butter that’s too cold won’t mix well, and melted butter can make the cookies greasy.
- Chill Your Doughwell: I once skipped chilling and ended up with flat cookies that lost their festive shape—lesson learned!
- Use a Sharp Knife for Slicing: Dull knives can squish the dough, making your slices uneven and messy.
- Watch the Bake Time: It’s tempting to leave them longer, but these cookies are better when just lightly golden—otherwise, they can turn dry.
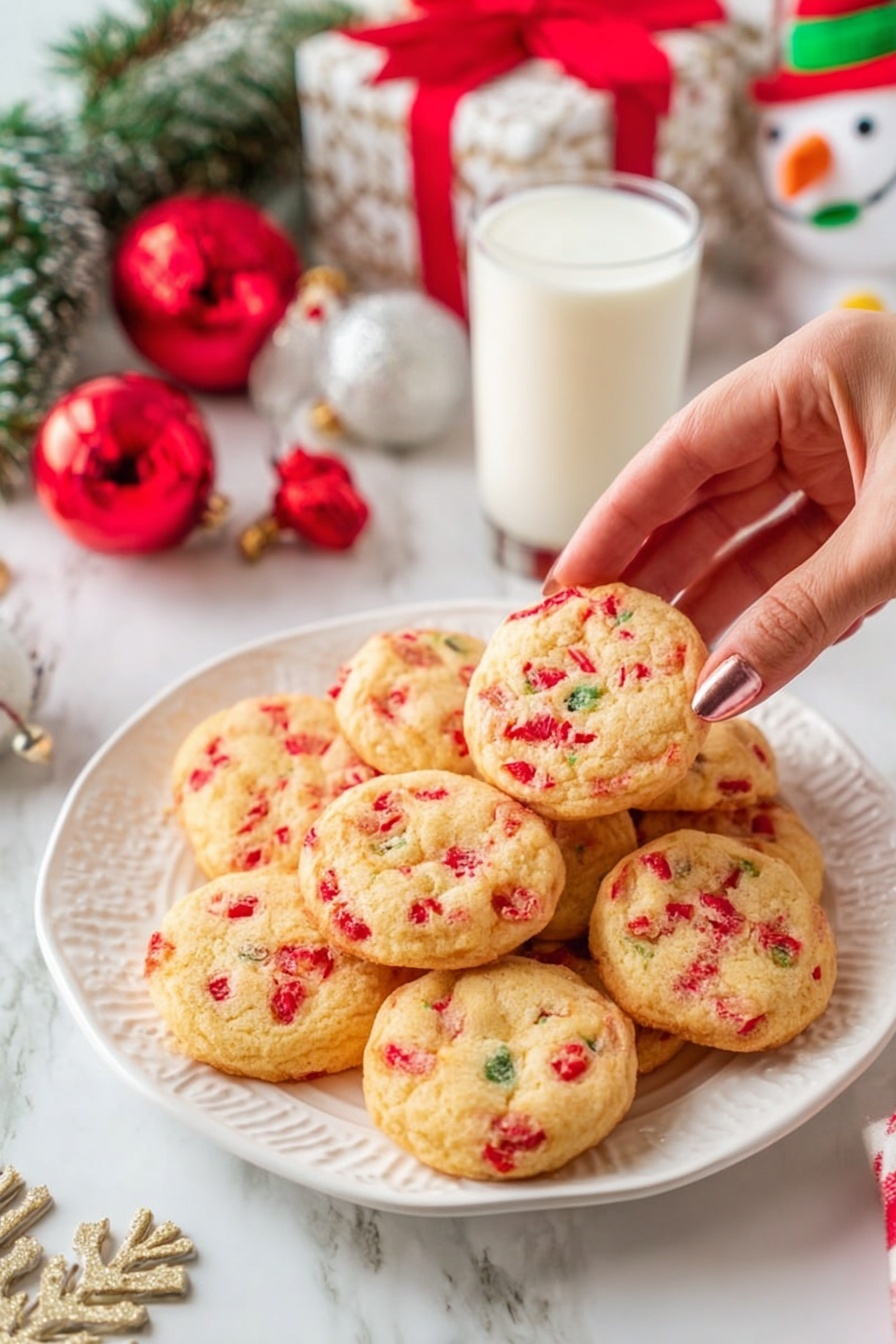
How to Serve Cherry Christmas Cookies Recipe
Garnishes
I like to dust these cookies with a light sprinkle of powdered sugar just before serving—it gives them a snowy, magical look that’s perfect for the holidays. Sometimes, a few extra candied cherries scattered on the platter adds a nice pop of color and hints at what’s inside each cookie.
Side Dishes
Pair these sweet treats with a warm cup of spiced tea, mulled wine, or even a simple glass of milk for the kids. They also make a lovely companion alongside a cheese board during holiday gatherings—think of the cookies as your sweet counterpoint to tangy cheeses and savory crackers.
Creative Ways to Present
For gifting, I like to stack them in a festive tin layered with parchment paper, tied with a seasonal ribbon. Another fun idea I tried was arranging them on a holiday-themed platter with sprigs of pine and cinnamon sticks—very cozy and festive. You could also package them in clear cellophane bags with a charming tag for neighbors or coworkers.
Make Ahead and Storage
Storing Leftovers
Once cooled completely, store your Cherry Christmas Cookies in an airtight container at room temperature. They keep well for up to a week. I always place a piece of parchment paper between layers to keep them from sticking together, and honestly, they rarely last that long in my house!
Freezing
I’ve found that freezing the dough logs before slicing is the best way to preserve freshness. Just wrap them tightly in plastic wrap and place them in a freezer bag. When you’re ready, thaw in the fridge overnight before slicing and baking. You can also freeze baked cookies for up to three months—thaw at room temperature and enjoy.
Reheating
If you want that fresh-baked warmth, pop the cookies in a 300°F oven for about 5 minutes. It revives their crisp edges and makes the cherries soft again without drying them out. Microwaves can make the texture rubbery, so I stick to the oven method.
Frequently Asked Questions:
Fresh cherries have a higher moisture content which could change the texture of the cookies and make the dough too wet. Candied cherries are preferable because they distribute evenly and maintain the cookie’s structure and sweetness.
Walnuts and pecans are my favorites because of their flavor and crunch, but almonds or hazelnuts also complement the cherries well. Just make sure to chop them finely for even distribution.
Absolutely! This recipe scales well—just make sure your mixing bowl can handle it, and you might need to chill the dough logs a bit longer if they’re thicker.
Chilling the dough logs thoroughly before slicing is crucial. Also, avoid slicing the dough logs too thin. Using parchment paper and spacing cookies appropriately on the baking sheet also helps maintain their shape.
Final Thoughts
This Cherry Christmas Cookies Recipe isn’t just a holiday baking project—it’s one of those recipes that can spark nostalgia, make your kitchen smell amazing, and bring everyone to the table. Whether you're packing tins for gifting or simply enjoying them with a cozy blanket and a cup of cocoa, these cookies never disappoint. Give them a try this year; I promise you’ll want to make them a holiday tradition too!
Print
Cherry Christmas Cookies Recipe
- Prep Time: 10 minutes
- Cook Time: 15 minutes
- Total Time: 3 hours 25 minutes
- Yield: 48 cookies
- Category: Dessert
- Method: Baking
- Cuisine: American
Description
These Cherry Christmas Cookies are a festive treat featuring a buttery dough studded with chopped nuts and colorful candied cherries. Rolled into logs and sliced into perfect rounds, they bake up to a light golden color and bring seasonal cheer to any cookie platter.
Ingredients
Cookie Dough
- 1 cup butter
- 1 cup powdered sugar
- 1 egg
- 1 teaspoon vanilla extract
- 2 ¼ cups all-purpose flour
- 1 cup chopped nuts
- 2 cups candied cherries, quartered (red, green, or a combination)
Instructions
- Preheat Oven: Preheat your oven to 350 degrees Fahrenheit to get it ready for baking the cookies.
- Cream Butter and Sugar: In a mixing bowl, cream together the butter and powdered sugar until the mixture is light and fluffy.
- Add Egg and Vanilla: Beat in the egg and vanilla extract until well combined.
- Incorporate Flour: Gradually add the flour to the mixture, mixing slowly to form a smooth dough.
- Fold in Nuts and Cherries: Gently fold the chopped nuts and quartered candied cherries into the dough, ensuring the cherries are evenly distributed.
- Shape Dough Logs: Place a third of the dough onto a piece of parchment or waxed paper and roll it into a log approximately 2 inches in diameter. Wrap the log securely in the paper.
- Repeat Shaping: Repeat the rolling and wrapping process two more times with the remaining dough to form three logs total.
- Chill Dough: Refrigerate the wrapped dough logs for at least 3 hours to firm up.
- Slice Cookies: Remove the dough from the refrigerator and unwrap each log. Using a sharp knife, slice the dough into ¼ inch thick rounds.
- Prepare for Baking: Place the cookie slices on a baking sheet lined with parchment paper, spacing them adequately.
- Bake Cookies: Bake in the preheated oven for 15 minutes, or until the cookies turn light golden in color.
- Cool and Serve: Remove the cookies from the oven and allow them to cool on a wire rack before serving.
Notes
- Use red or green candied cherries, or a mixture, to enhance the festive appearance of the cookies.
- Chilling the dough logs is essential to achieve clean slices and prevent spreading during baking.
- Store cookies in an airtight container to maintain freshness for up to one week.
- For a nut-free version, omit the nuts or substitute with seeds if desired.
Nutrition
- Serving Size: 1 cookie
- Calories: 120 kcal
- Sugar: 8 g
- Sodium: 45 mg
- Fat: 7 g
- Saturated Fat: 4 g
- Unsaturated Fat: 2 g
- Trans Fat: 0 g
- Carbohydrates: 14 g
- Fiber: 1 g
- Protein: 1 g
- Cholesterol: 20 mg

Leave a Reply