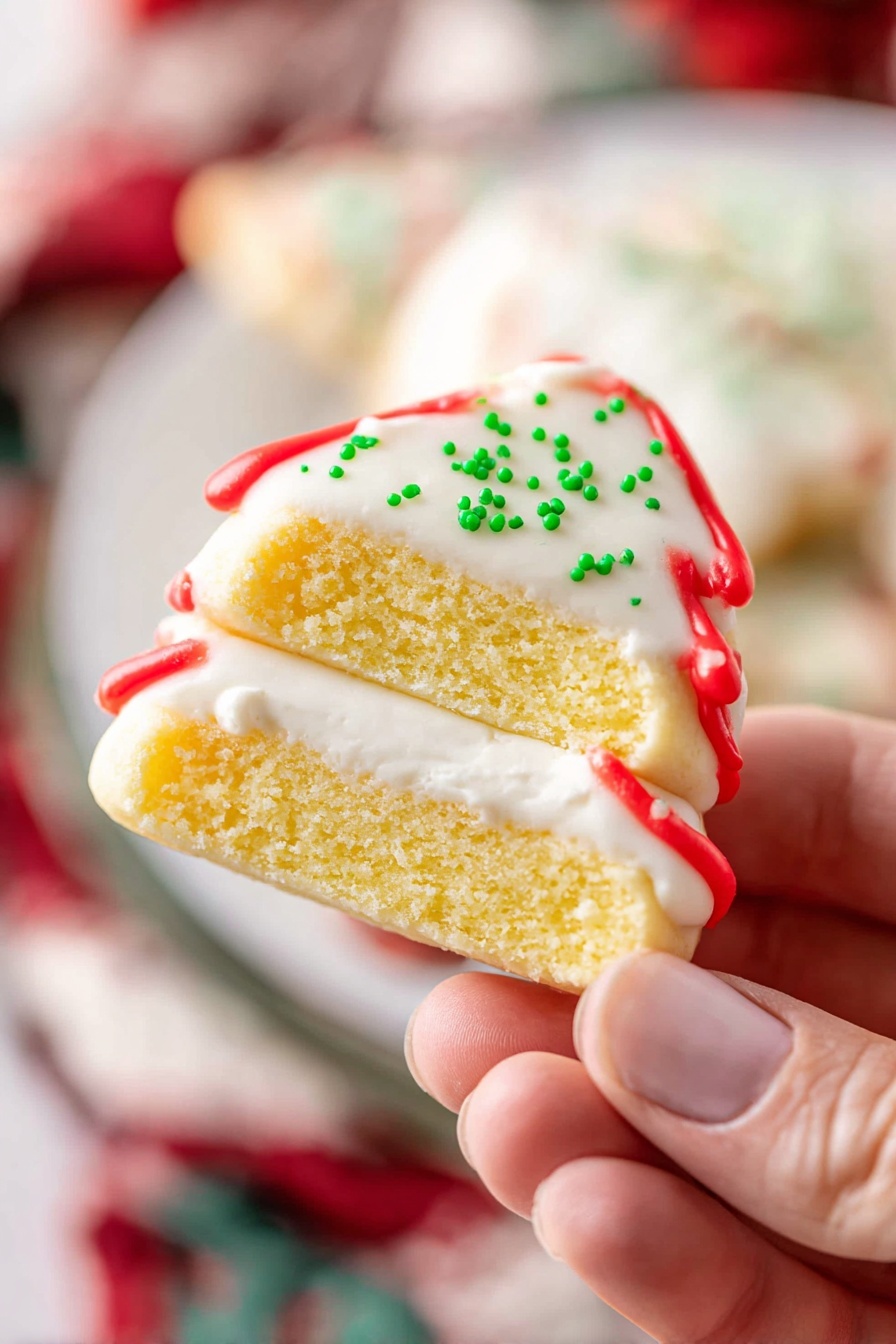
There’s just something so fun and nostalgic about these festive treats. The Copycat Little Debbie Christmas Tree Cakes Recipe brings back holiday joy with its soft cake, fluffy filling, and that perfect sweet coating. It’s truly worth making to recreate that childhood delight right in your own kitchen.

Jump to:
- Why You'll Love This Recipe
- Ingredients & Why They Work
- Make It Your Way
- Step-by-Step: How I Make Copycat Little Debbie Christmas Tree Cakes Recipe
- Top Tip
- How to Serve Copycat Little Debbie Christmas Tree Cakes Recipe
- Make Ahead and Storage
- Frequently Asked Questions:
- Final Thoughts
- Copycat Little Debbie Christmas Tree Cakes Recipe
Why You'll Love This Recipe
I’ve made these little tree cakes more times than I can count during the holidays, and each time they bring the same excitement—both from the baking process and the smiles when they’re eaten. This recipe feels festive but is surprisingly easy, making it a go-to for holiday celebrations.
- Authentic Flavor & Texture: It perfectly mimics the original, with moist cake, sweet marshmallow filling, and a smooth coating.
- Simple Ingredients: Using common pantry staples means you can whip these up without a special trip to the store.
- Kid-Friendly Fun: Kids love helping with the decorating, especially piping on those cute red stripes.
- Great Make-Ahead Treat: You can prep them in advance and freeze, making holiday hosting less hectic.
Ingredients & Why They Work
The ingredients in this Copycat Little Debbie Christmas Tree Cakes Recipe come together to create the perfect balance of flavor and texture. Each plays a role to build that cherished classic taste and feel, plus they’re easy to source at most grocery stores.
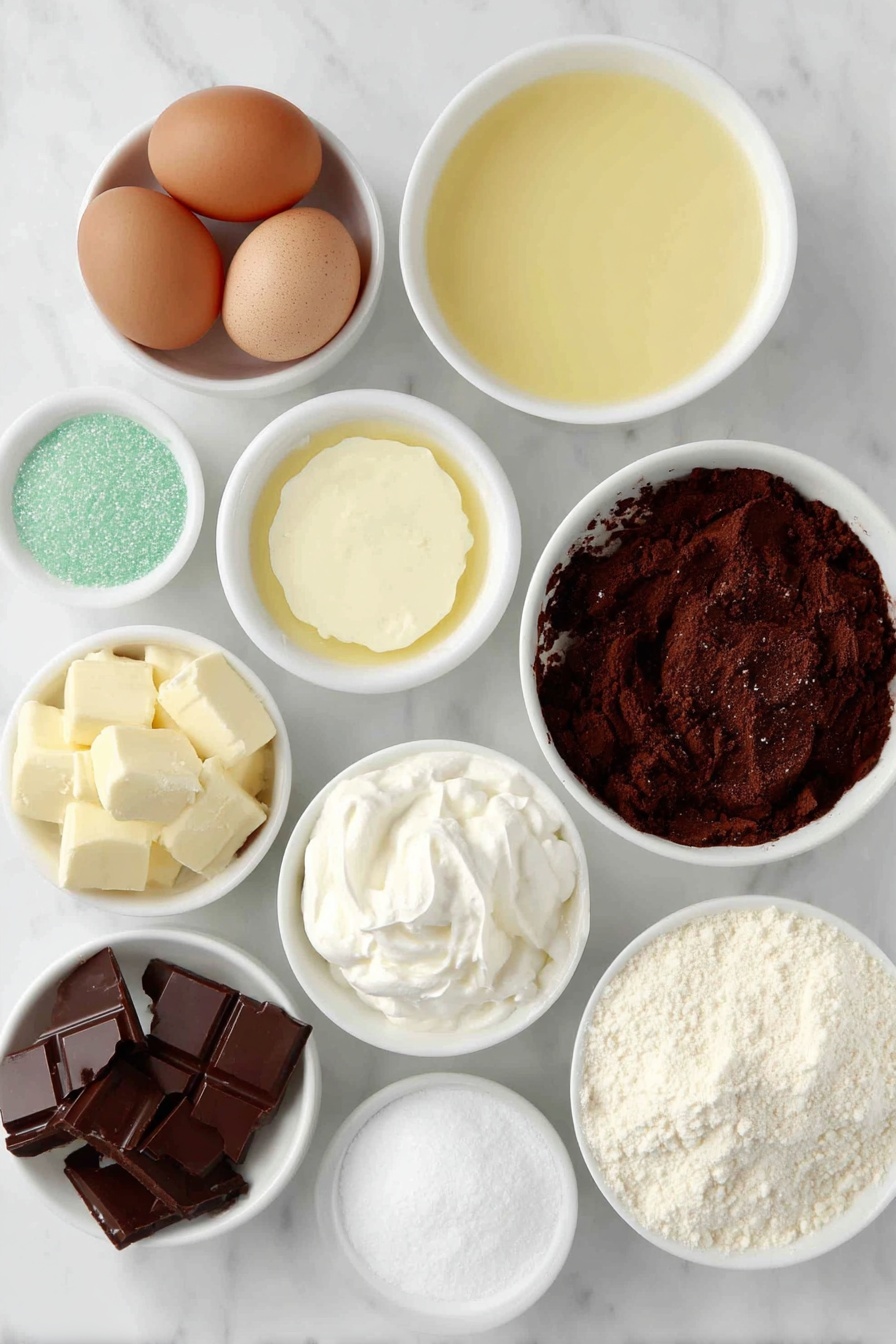
- Yellow Cake Mix: The base of the treat, it keeps things quick and consistent without sacrificing moistness.
- Eggs and Milk: Adding richness and tenderness to the cake batter.
- Melted Butter: Gives the cake more depth of flavor than oil and contributes to a tender crumb.
- Marshmallow Fluff: Vital for that light, sweet, and creamy filling that feels nostalgic.
- Butter (for Filling): Adds creaminess and helps the filling hold its shape well for easy assembly.
- Powdered Sugar: Sweetens and thickens the filling without grittiness.
- White Almond Bark: This melts smoothly for an easy-to-dip coating that hardens perfectly with a nice sheen.
- Red Candy Melts: Great for the festive decorative stripes — melts easily and holds color well.
- Green Sanding Sugar: Adds sparkle and texture to mimic “green needles” on the trees.
Make It Your Way
One of my favorite things about making the Copycat Little Debbie Christmas Tree Cakes Recipe is how easy it is to personalize. Whether you prefer a richer filling or want to try different colors for decorating, it’s fun to put your own spin on it.
- Variation: I sometimes swap the yellow cake mix for a funfetti version to add sprinkles inside the cake—kids absolutely love that twist!
Step-by-Step: How I Make Copycat Little Debbie Christmas Tree Cakes Recipe
Step 1: Prepare the Cake Batter and Bake
Preheat your oven to 350°F and line a 16×12 inch jelly roll pan with parchment paper, giving it a light spritz of nonstick spray. Pro tip: I use binder clips to hold the parchment in place so it doesn’t slip around when pouring the batter. Then whisk together the yellow cake mix, eggs, egg yolk, milk, and melted butter until super smooth—no lumps! Pour and spread the batter evenly, then bake for 12 to 15 minutes. Keep an eye on it; the cake is done when a toothpick comes out with just a few moist crumbs. Let it cool completely—this is key before layering the filling.
Step 2: Whip Up the Fluffy Filling
While the cake cools, beat the marshmallow fluff, softened butter, and powdered sugar together until you get a silky smooth mixture. Then add the milk and crank the mixer on high for a couple of minutes—this gives you that light, airy texture that makes the filling so dreamy and spreadable.
Step 3: Assemble and Cut Out Tree Shapes
Carefully slice your cake in half horizontally and spread the filling evenly over one half. Top it with the other half and gently press to sandwich the filling. To make cutting easier, pop the layered cake into the freezer for about 30 minutes. Then use a Christmas tree-shaped cookie cutter to cut out individual cakes. Place them on parchment-lined baking sheets and freeze again for about 30 minutes to firm up before the coating step.
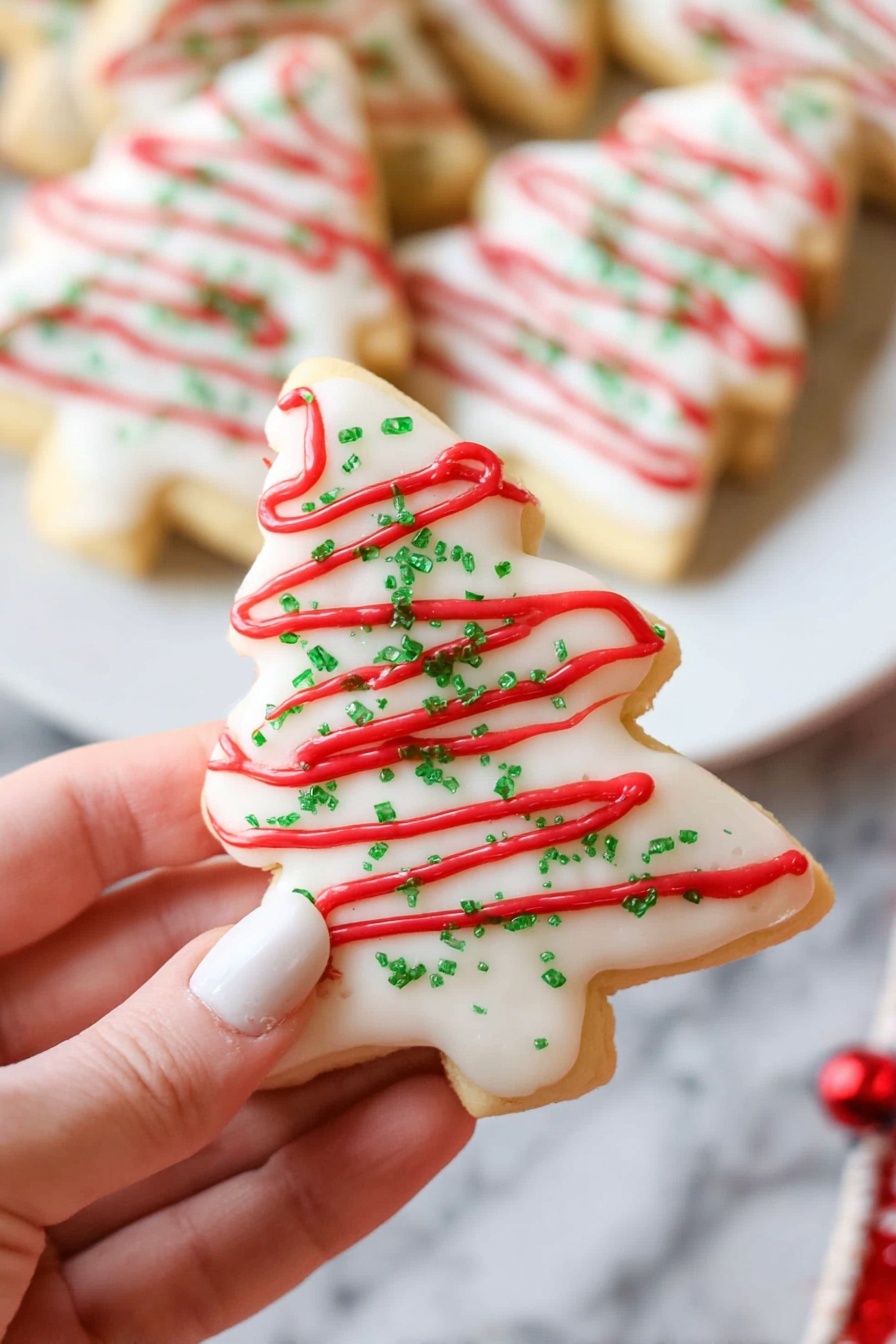
Step 4: Coat the Cakes and Decorate
Melt the white almond bark in 30-second bursts in the microwave, stirring in between, until silky smooth. Dip each tree cake into the melted coating, gently tapping off the excess, then sprinkle with green sanding sugar right away before the coating sets. For the red stripes, melt the candy melts similarly and transfer to a piping bag or sandwich bag with a tiny corner cut off. Pipe wavy red lines over the dried coating for that classic look.
Top Tip
From my many attempts making this Copycat Little Debbie Christmas Tree Cakes Recipe, I’ve learned a few tricks that make all the difference in the end result.
- Binder Clips for Parchment: Using binder clips to secure parchment paper is a simple hack that prevents slipping and ensures even baking.
- Chill Before Cutting: Freezing the filled cake makes cutting clean, neat tree shapes so you aren't left with crumbled edges.
- Work Quickly When Coating: The almond bark sets fast, so have your green sanding sugar ready to sprinkle immediately for the best stick.
- Thin Candy Melts If Needed: Adding a tiny bit of coconut oil can help prevent thick, clumpy piping lines—practice on parchment before decorating all your trees.
How to Serve Copycat Little Debbie Christmas Tree Cakes Recipe
Garnishes
I like to keep it simple here—a sprinkle of extra green sanding sugar on the serving plate adds a bit of sparkle, and sometimes little edible pearl candies mimic tiny ornaments. These little details elevate the presentation without complicating things.
Side Dishes
Since this recipe is a sweet treat, I usually serve it as part of a holiday dessert spread—think classic hot cocoa, a bowl of fresh berries, or even spiced nuts alongside. They’re perfect bite-sized options that complement the richness without overwhelming.
Creative Ways to Present
For parties, I’ve arranged these tree cakes standing upright on a bed of shredded coconut dyed green for “grass.” Or you can place them on tiered trays with string lights to create a whimsical holiday display that’s sure to wow guests.
Make Ahead and Storage
Storing Leftovers
Once decorated, store your Christmas tree cakes in an airtight container at room temperature for up to 3 days or pop them in the fridge for up to 5 days to keep them fresh. I usually layer parchment paper between cakes to prevent sticking and preserve their delicate coating.
Freezing
I’ve had great luck freezing these cakes individually wrapped in plastic wrap and stored in a freezer-safe container. They keep well for a couple of months, which is a lifesaver for busy holiday schedules. Just thaw in the fridge before serving.
Reheating
Since these are best served cool, I don’t recommend reheating. But if the coating loses some shine after thawing, a quick brush with a bit of melted almond bark can bring back that lovely glossy finish.
Frequently Asked Questions:
Absolutely! Homemade yellow cake works just as well and adds an extra touch of love. Just make sure it’s baked in a similar-sized sheet pan for even layers.
You can substitute white chocolate chips or wafers, but be careful to melt them gently and stir often to avoid burning. Adding a small amount of shortening helps create a smoother coating.
Chilling the filled cake in the freezer before cutting really helps keep the filling in place by firming it up. Use a sharp cookie cutter and gently press straight down without twisting.
Yes! These are perfect for making a day or two ahead. Store covered in the fridge or freeze and thaw the day before serving for a fresh, festive treat.
Final Thoughts
This Copycat Little Debbie Christmas Tree Cakes Recipe has become a holiday staple in my kitchen. It’s simple enough to bake with kids yet elegant enough to impress guests. Making these little trees is like catching a glimpse of holiday magic — and I’m pretty sure you’ll love them just as much as I do!
Print
Copycat Little Debbie Christmas Tree Cakes Recipe
- Prep Time: 30 minutes
- Cook Time: 15 minutes
- Total Time: 1 hour 45 minutes
- Yield: 12 cakes
- Category: Dessert
- Method: Baking
- Cuisine: American
Description
This Copycat Little Debbie Christmas Tree Cakes recipe recreates the festive favorite with moist yellow cake, fluffy marshmallow filling, and a smooth white almond bark coating decorated with green sanding sugar and red candy melt stripes. Perfect for holiday gatherings, these charming tree-shaped treats are fun to make and delicious to enjoy.
Ingredients
Cake
- 13.25 ounce box yellow cake mix
- 3 large eggs
- 1 large egg yolk
- 1 cup whole milk
- ½ cup melted butter
Filling
- 7 ounces marshmallow fluff
- ¾ cup butter, room temperature
- 2 cups powdered sugar
- 2 tablespoons whole milk
Coating and Decoration
- 1 pound white almond bark
- 1 cup red candy melts
- Green sanding sugar
Instructions
- Preheat and Prepare Pan: Preheat oven to 350 degrees F. Line a 16×12 inch jelly roll pan with parchment paper and lightly grease it with nonstick cooking spray. Secure edges with binder clips to keep parchment in place.
- Make Cake Batter: In a large mixing bowl, whisk together yellow cake mix, 3 whole eggs, 1 egg yolk, 1 cup whole milk, and ½ cup melted butter until smooth and combined.
- Bake Cake: Spread batter evenly in the prepared pan using an angled spatula. Bake in preheated oven for 15 minutes or until a toothpick inserted in the center comes out clean or with moist crumbs. Remove from oven and cool completely.
- Prepare Filling: In a medium bowl, beat marshmallow fluff, ¾ cup room temperature butter, and 2 cups powdered sugar with a hand mixer on medium speed until smooth and incorporated. Add 2 tablespoons milk and whip on high speed for 1 to 2 minutes until light and fluffy.
- Assemble Cake Layers: Cut the cooled cake in half horizontally. Spread the filling evenly over one cake half, then top with the other half to create a filled cake layer.
- Cut Out Trees: Using a tree-shaped cookie cutter, carefully cut out tree shapes from the filled cake layers. Place cut trees on a parchment-lined baking sheet. For easier cutting, freeze the filled cake for 30 minutes beforehand if desired.
- Chill Trees: Place the filled trees in the freezer to chill for 30 minutes to firm up.
- Melt White Almond Bark: In a microwave-safe bowl, microwave the white almond bark in 30-second intervals, stirring after each, until smooth and fully melted.
- Coat Trees: Dip each chilled tree into the melted white almond bark, tapping off excess coating. Place coated trees on parchment-lined tray and immediately sprinkle green sanding sugar on top so it sticks. Repeat for all trees.
- Melt Red Candy Melts: In a microwave-safe bowl, microwave the red candy melts in 30-second intervals, stirring until smooth. If too thick, add ¼ teaspoon melted shortening or coconut oil to thin.
- Decorate with Red Stripes: Transfer melted red candy melts into a sandwich bag, cut a small hole in one corner, and pipe red wavy stripes onto the white coated trees.
Notes
- Store leftovers in an airtight container for 3 days or refrigerate for up to 5 days to maintain freshness.
- If short on time, canned frosting can be used in place of the homemade filling.
- Yield depends on the size of your tree-shaped cookie cutter; smaller cutters yield more cakes.
- Freezing the filled cake before cutting makes shaping easier and cleaner.
- Use binder clips to keep parchment paper secure during batter spreading and baking.
Nutrition
- Serving Size: 1 cake
- Calories: 310 kcal
- Sugar: 28 g
- Sodium: 180 mg
- Fat: 18 g
- Saturated Fat: 10 g
- Unsaturated Fat: 7 g
- Trans Fat: 0 g
- Carbohydrates: 35 g
- Fiber: 1 g
- Protein: 3 g
- Cholesterol: 55 mg


Leave a Reply