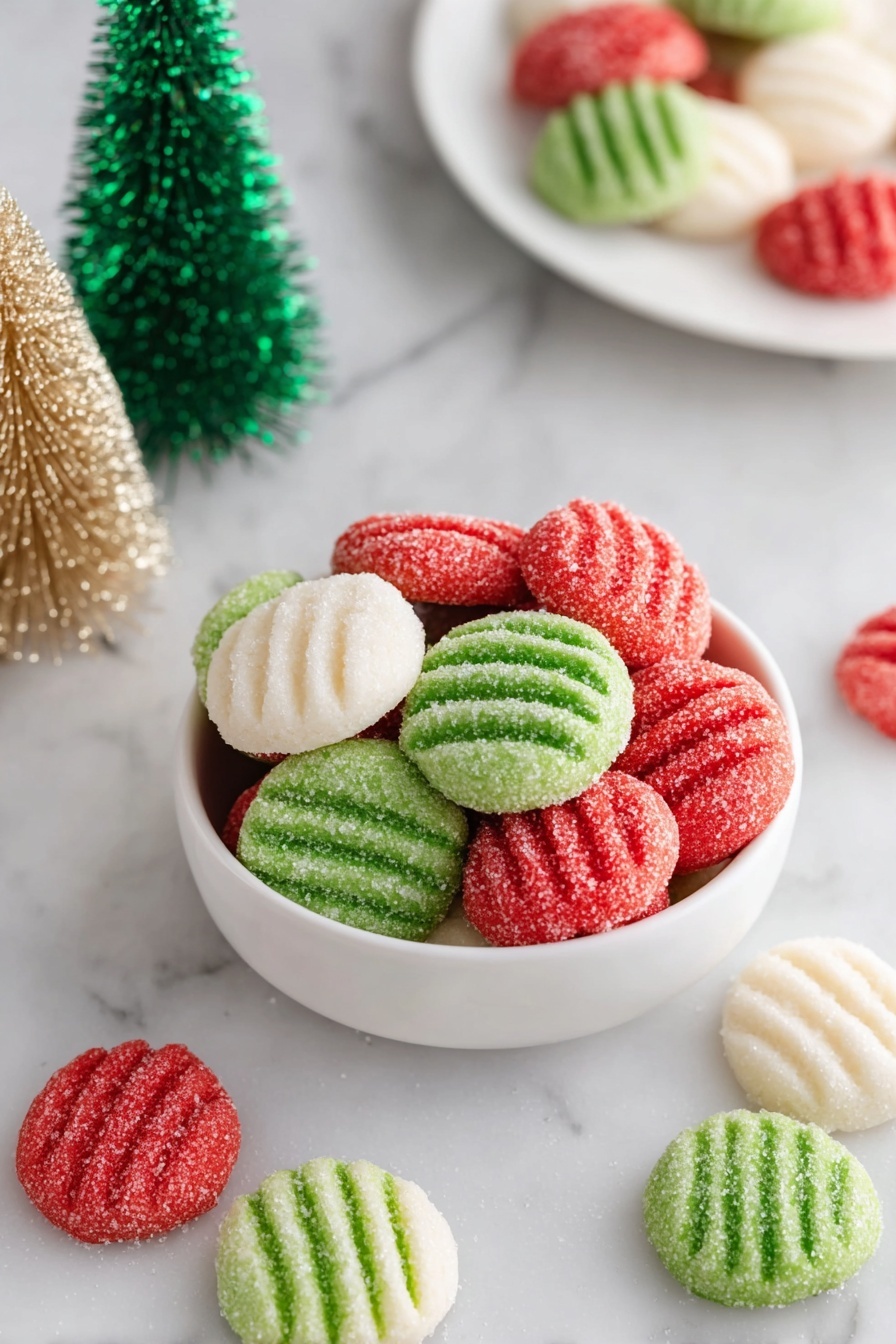
Imagine the scent of fresh peppermint and the joy of homemade holiday treats—this Festive Peppermint Mints Recipe brings both to your kitchen. These colorful, creamy mints are not just delicious but also a fun way to brighten up your festive gatherings.

Why You'll Love This Recipe
I’m telling you, these mints instantly became a holiday staple in my home. They’re creamy, sweet with just the right peppermint kick, and so much fun to make—especially if you want a hands-on festive activity.
- Perfect Balance: The creamy texture from cream cheese blends beautifully with the sweet, minty flavor for a melt-in-your-mouth treat.
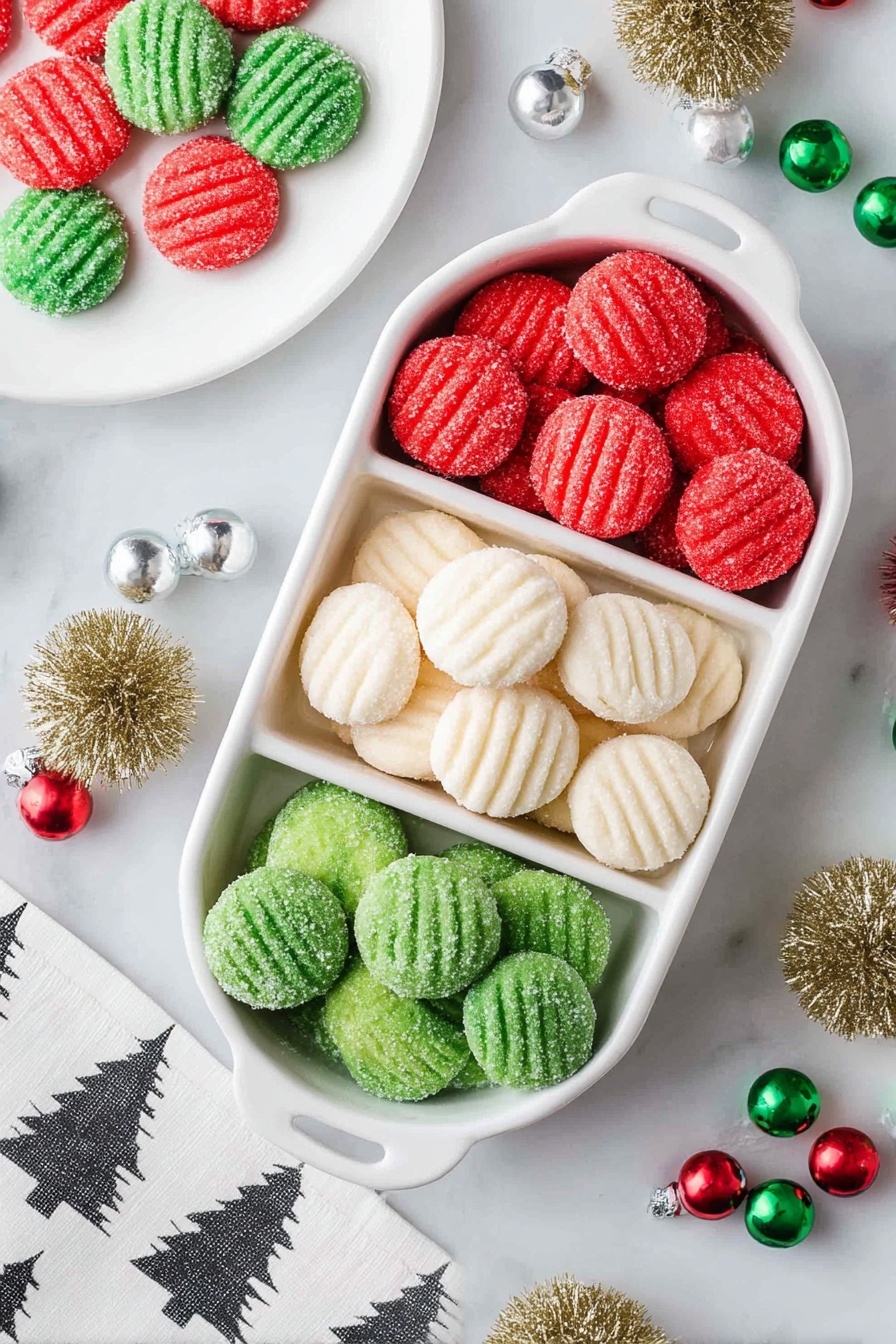
- Colorful & Festive: Red, green, and white layers make these mints super festive and eye-catching on any holiday dessert tray.
- Great for Gifting: These peppermint candies are perfect to package up as heartfelt homemade gifts for friends and family.
- Simple Ingredients: You probably have everything in your pantry already, making this a fuss-free festive project.
Ingredients & Why They Work
This recipe’s ingredients come together for both flavor and texture. The cream cheese and butter give the mints that signature creaminess, while powdered sugar sweetens and sets their shape. Peppermint extract is the star here, of course, and the food coloring brings festive cheer.
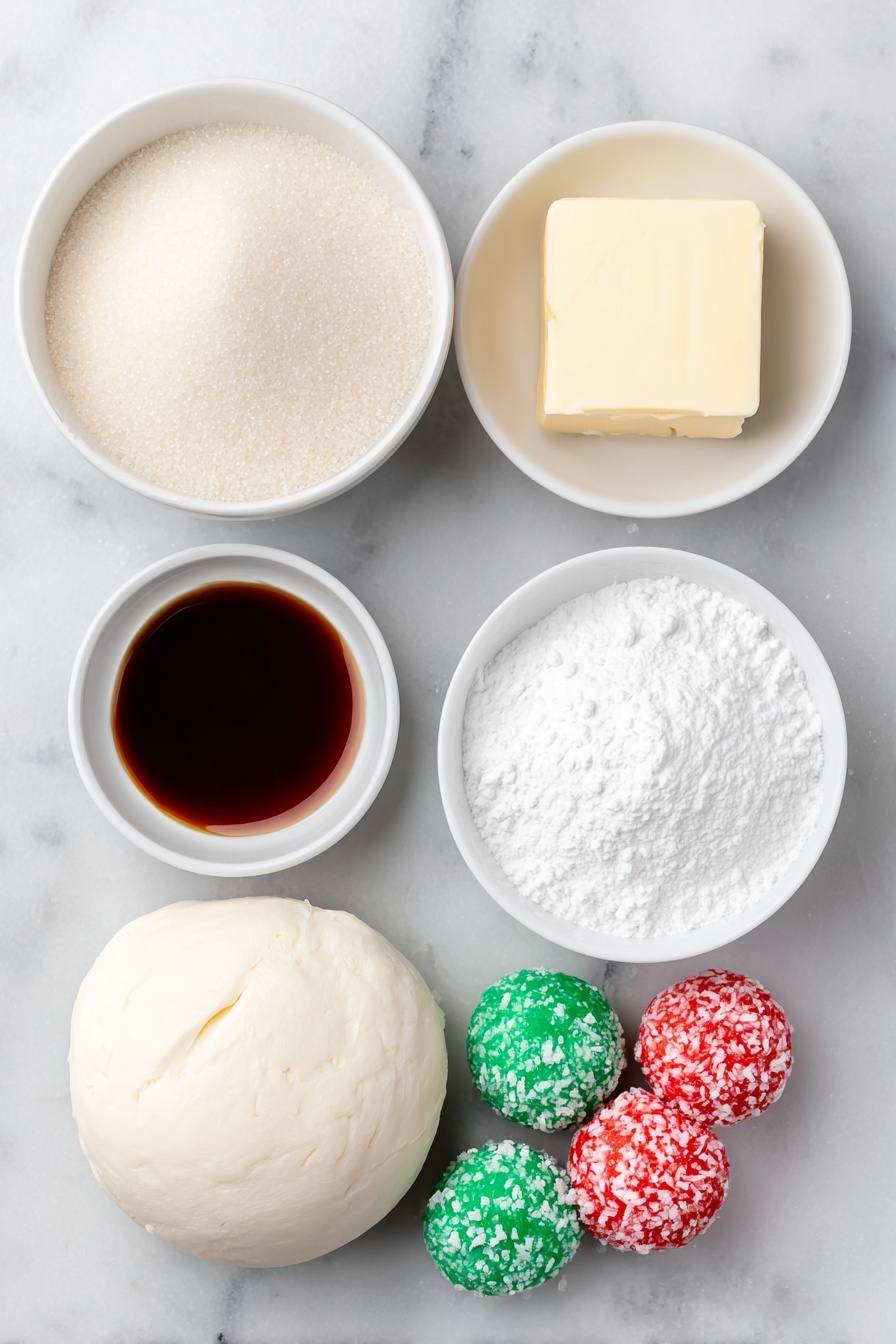
- Granulated sugar: Used to coat the mints for an extra bit of crunch and sparkle.
- Cream cheese: Adds richness and smooth texture; make sure it’s at room temp for easier mixing.
- Unsalted butter: Softens the mixture and complements the cream cheese’s tang.
- Light/clear corn syrup: Helps bind ingredients and keeps mints chewy, not crumbly.
- Peppermint extract: Brings that fresh, cool mint flavor essential to festive mints.
- Powdered sugar: Sweetens and helps form the dough; you’ll use some for kneading too.
- Green and red liquid food coloring: For classic Christmas colors—just a few drops go a long way.
Make It Your Way
One of my favorite things about this Festive Peppermint Mints Recipe is how easy it is to personalize. You can adjust colors for different holidays or even swap peppermint extract for something like vanilla for a twist.
- Variation: I once tried half mint and half lemon extract for a fun surprise. It turned out bright and refreshing!
- Allergy-Friendly: Using gel food coloring instead of liquid keeps the dough the right consistency without adding moisture, plus it’s safe for nut allergies.
- Color Play: For a more striking red or green, add the food coloring gradually, checking the hue as you go.
Step-by-Step: How I Make Festive Peppermint Mints Recipe
Step 1: Get Your Basics Ready and Mix
Start by lining a large rimmed baking tray with parchment paper—this keeps your mints from sticking later. In a large bowl, beat the softened cream cheese, butter, corn syrup, and peppermint extract together with a handheld mixer on low. I usually mix for about a minute or until everything looks smooth; this ensures the base is creamy enough before adding sugar.
Step 2: Work In the Powdered Sugar
Slowly add the powdered sugar, about half a cup at a time on low speed. When the mixture gets thick, switch to mixing by hand with a spatula or wooden spoon. You want a firm but not sticky dough—this may need a little patience. Don’t rush it, because the texture here makes all the difference.
Step 3: Divide and Color Your Dough
Turn the dough out onto parchment sprinkled with powdered sugar to keep it from sticking. Divide into thirds for red, green, and white portions. Make a shallow well in two balls and add the liquid food coloring drops carefully. Knead each until the color spreads evenly, adding a bit of powdered sugar as needed to balance stickiness from the food coloring. I always add it gradually—you can’t take it away once it’s mixed in!
Step 4: Roll, Slice, and Shape
Roll each colored dough ball into a long rope, about an inch thick and 18 inches long. Slice into half-inch pieces, then roll each into small balls between your palms. These little mints are so satisfying to shape — like rolling tiny holiday treasures!
Step 5: Coat and Stamp Your Mints
Toss 2-3 balls at a time in granulated sugar to coat, then place them on your parchment-lined tray. Use the fork tines to gently press discs onto the tops—this gives a pretty, striped design. I always admire how that little step adds charm without effort. Let them rest at room temperature for up to 24 hours so they dry and set fully before serving or gifting.
Top Tip
Through making this Festive Peppermint Mints Recipe multiple times, I’ve learned a few things that really help avoid common pitfalls—especially about texture and coloring.
- Gradual Sugar Addition: Adding powdered sugar bit by bit helps you hit the perfect dough consistency without it turning stiff too soon.
- Food Coloring Patience: Don’t add all the drops at once—start small and build color gradually to avoid making dough overly sticky.
- Kneading Technique: Sprinkle powdered sugar lightly on dough and your hands as you knead to keep it workable and prevent sticking.
- Resting Time: Let the mints set for a full 24 hours. I used to rush this step and always noticed they didn’t hold their shape as well.
How to Serve Festive Peppermint Mints Recipe
Garnishes
I often sprinkle a few crushed peppermint candies or edible glitter over the mints for added sparkle. Sometimes, I wrap a few in festive wax paper to give as gifts—presentation makes these feel extra special.
Side Dishes
These mints pair beautifully with hot cocoa or coffee, especially after a hearty holiday meal. I love setting out a platter of these alongside soft gingerbread cookies to round out a festive dessert table.
Creative Ways to Present
For parties, arranging them in small glass bowls or clear treat bags tied with ribbons is a winner. One year, I made a peppermint mint “cake” by stacking layers with parchment paper in between—it’s a great showstopper!
Make Ahead and Storage
Storing Leftovers
I store these mints in an airtight container in the fridge to keep them fresh and firm. They last up to two weeks chilled, which is perfect when you make a big batch early for the holidays.
Freezing
If you want to make them ahead of time, freeze the mints in a freezer-safe container. When I’ve done that, they keep well for up to three months. Just thaw in the fridge overnight before serving to keep their shape and freshness.
Reheating
These festive mints don’t require reheating since they’re best enjoyed cool or at room temperature. If they become too chilled, just let them sit at room temp for 15-20 minutes to bring out their flavors and soften their texture slightly.
Frequently Asked Questions:
Cream cheese is key to the smooth, creamy texture of these mints, so I don’t recommend skipping it. If you’re looking for a dairy-free version, you might try cream cheese substitutes, but texture and flavor will vary.
I find letting them sit at room temperature for up to 24 hours makes a big difference. It helps them firm up nicely and develop that perfect texture before serving or packaging.
Using gel or paste food coloring instead of liquid helps keep the dough manageable because they add less moisture. If you only have liquid, add it drop by drop and knead in powdered sugar as needed to prevent stickiness.
Because of the cream cheese and butter, I recommend storing these candies in the refrigerator. At room temperature, they might get soft or spoil more quickly, especially in warm climates.
Final Thoughts
This Festive Peppermint Mints Recipe has become a cherished holiday tradition for me. There’s something about making these colorful, creamy mints that turns the kitchen into a cozy gathering spot—and tasting them brings instant smiles. I hope you make this recipe soon and that it adds a little magic to your holiday celebrations too!
Print
Festive Peppermint Mints Recipe
- Prep Time: 15 minutes
- Cook Time: 0 minutes
- Total Time: 1 hour 15 minutes
- Yield: 100 candies
- Category: Dessert
- Method: No-Cook
- Cuisine: American
- Diet: Vegetarian
Description
Classic Christmas Mints recipe featuring creamy peppermint-flavored candies colored red, green, and white. These no-bake peppermint patties are easy to make, perfect for holiday gifting or festive treats, and have a delightful soft texture with a refreshing mint flavor.
Ingredients
Main Ingredients
- ⅓ cup granulated sugar
- 4 ounces cream cheese, room temperature
- 2 tablespoons unsalted butter, room temperature
- 2 tablespoons light/clear corn syrup (Karo brand preferred)
- 1 teaspoon peppermint extract
- 4¼ cups powdered sugar, divided
- 6 drops green liquid food coloring
- 6 drops red liquid food coloring
Instructions
- Prepare baking tray: Line a large rimmed baking tray with parchment paper. Place the granulated sugar into a small bowl and set aside for coating later.
- Mix base dough: In a large mixing bowl, use a handheld mixer on low speed to beat the cream cheese, unsalted butter, light corn syrup, and peppermint extract for 1 minute until smooth and well combined.
- Add powdered sugar: Slowly add 4¼ cups powdered sugar, ½ cup at a time, mixing on low speed. As the dough thickens, switch to a spatula or wooden spoon and finish mixing by hand until fully combined and dough is firm.
- Divide and color dough: Lay out parchment paper on a clean surface and sprinkle with ¼ cup powdered sugar. Turn out the dough onto the paper and divide it equally into three parts. Make a shallow well in two dough balls; add red food coloring to one and green to the other; leave the third plain white.
- Knead colored dough: Knead each colored dough ball until color is evenly distributed. Add up to an additional ¼ cup powdered sugar as needed during kneading to reduce stickiness, adding gradually. Knead the white dough lightly with 1-2 tablespoons powdered sugar if sticky.
- Form ropes: Roll each dough ball into an 18-inch long rope about 1 inch thick on a lightly powdered surface.
- Slice ropes: Using a knife, cut each rope into ½-inch slices from one end to the other, repeating for all ropes.
- Shape mints: Roll each slice between your palms into small balls and set aside.
- Coat with sugar: Drop 2-3 dough balls at a time into the granulated sugar bowl and toss to coat thoroughly. Place coated balls evenly on the prepared baking tray.
- Shape discs: Using the tip of a fork, lightly press each sugar-coated ball to form a small disc shape with a decorative striped pattern.
- Set candies: Let the Christmas peppermint patties sit out on the tray at room temperature for up to 24 hours to dry and set before serving or storing.
Notes
- This recipe yields approximately 100 peppermint candies.
- Store in an airtight container in the refrigerator for up to 2 weeks to keep fresh.
- For longer storage, freeze in a freezer-safe container for up to 3 months. Thaw in the fridge before serving.
- Adding up to ½ teaspoon liquid food coloring can deepen the color intensity if desired.
- Adjust powdered sugar when kneading to avoid dough being sticky or too stiff; adding gradually is key.
- Gel food coloring can be used for more vibrant colors and less added moisture.
- This recipe is nut allergy safe when using recommended ingredients.
Nutrition
- Serving Size: 1 candy
- Calories: 25 kcal
- Sugar: 3 g
- Sodium: 15 mg
- Fat: 1.2 g
- Saturated Fat: 0.7 g
- Unsaturated Fat: 0.3 g
- Trans Fat: 0 g
- Carbohydrates: 3.5 g
- Fiber: 0 g
- Protein: 0.3 g
- Cholesterol: 5 mg


Leave a Reply