There’s something irresistibly comforting about a rich, silky gravy that’s made from scratch. This Homemade Turkey Gravy from Drippings Recipe captures all those deep, savory flavors you get straight from the pan and turns them into the perfect finishing touch for your turkey dinner. Trust me, it’s worth every minute you spend on it.

Jump to:
- Why You'll Love This Recipe
- Ingredients & Why They Work
- Make It Your Way
- Step-by-Step: How I Make Homemade Turkey Gravy from Drippings Recipe
- Top Tip
- How to Serve Homemade Turkey Gravy from Drippings Recipe
- Make Ahead and Storage
- Frequently Asked Questions:
- Final Thoughts
- Homemade Turkey Gravy from Drippings Recipe
Why You'll Love This Recipe
I love making this gravy because it feels like the essence of the entire turkey captured in a luscious pourable sauce. Whenever I whisk up this homemade turkey gravy, it elevates even the simplest of meals. Plus, making it yourself means you’re in full control of seasoning and texture.
- Genuine Flavor Boost: Using drippings straight from the roasting pan ensures you get that authentic, savory depth you just can’t replicate with store-bought gravy.
- Customizable Seasoning: Because you’re cooking it fresh, you can adjust salt, herbs, and spices to match your family’s preferences perfectly.
- Lump-Free Guarantee: I’ll share my foolproof tips so your gravy is always silky smooth—no clumps, no stress.
- Perfect for Any Occasion: Whether it’s a holiday feast or a cozy weeknight dinner, this gravy makes everything it touches taste better.
Ingredients & Why They Work
Every ingredient in this gravy has a purpose—some add thickness, others deepen the flavor. Using turkey drippings is the star, but combining it with butter and flour creates that silky base everyone loves. Here’s a quick look at why each ingredient is essential.
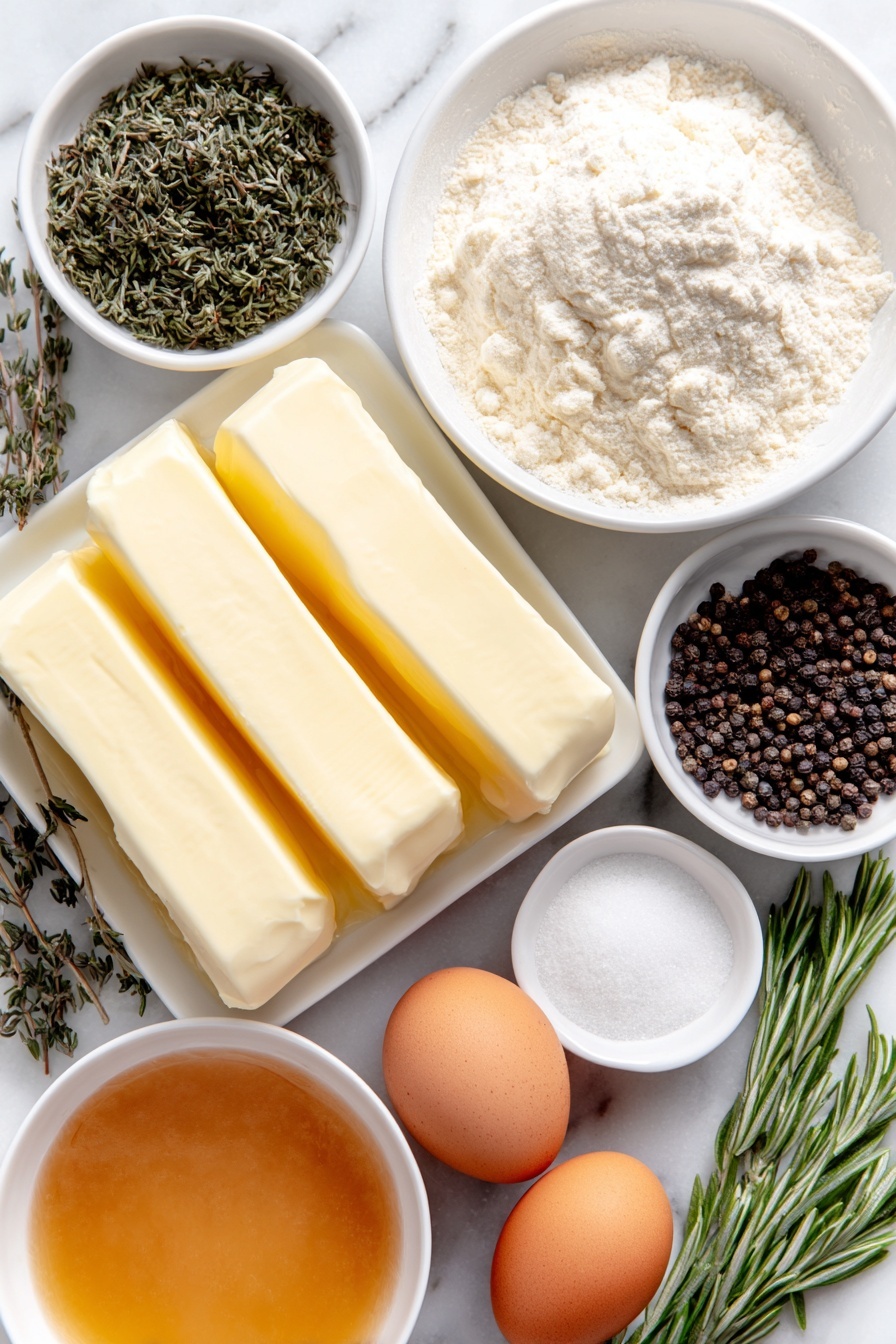
- Unsalted Butter: Adds richness and helps create a roux, the base that thickens your gravy perfectly.
- Flour: Works with butter to thicken the gravy smoothly, giving it just the right body.
- Turkey Drippings: The flavorful juices left after roasting, packed with savory depth and a concentrated turkey essence.
- Water: Adjusts the volume without diluting flavor too much, balancing thickness.
- Granulated Chicken Bouillon (optional): A handy way to enhance savory depth if your drippings are a bit mild.
- Seasonings: Garlic powder, dried thyme, sage, rosemary, onion powder, pepper, and parsley all build layers of herbaceous flavor—feel free to tweak these to suit your taste!
Make It Your Way
One of my favorite things about this Homemade Turkey Gravy from Drippings Recipe is how easy it is to personalize. I often tweak the herbs depending on what I have on hand or how the meal is flowing, and you can too!
- Variation: When I want a brighter flavor, I add a splash of white wine or a squeeze of fresh lemon juice at the end—it cuts through the richness beautifully.
- Dietary Modification: For a gluten-free gravy, swap the all-purpose flour with cornstarch or a gluten-free flour blend and adjust the amount for thickening.
- Seasonal Twist: During the holidays, I might stir in a pinch of ground nutmeg or even a hint of fresh thyme for a more festive aroma.
Step-by-Step: How I Make Homemade Turkey Gravy from Drippings Recipe
Step 1: Collect and Strain the Drippings
Once your turkey is out of the roasting pan, pour all the drippings (both liquid and solids) through a fine mesh sieve into a fat separator or a large freezer bag. I like using a fat separator because it makes removing the excess fat easy and efficient. If you don’t have one, don’t worry—you can tilt the sealed freezer bag so the fat pools at the top, then cut a tiny corner at the bottom to slowly pour out the defatted drippings. Set aside about 4 cups of liquid; if you’re short, add water to make up the difference.
Step 2: Make the Roux and Cook It Until Golden
In a large saucepan over medium-low heat, melt 6 tablespoons of unsalted butter. Once melted, sprinkle in ⅓ cup plus 1 tablespoon of flour and whisk constantly for about 4-5 minutes. Don’t rush this part; you’re looking for a deep golden color that will develop a nutty aroma without burning the flour. This step makes all the difference between lumpy, pasty gravy and smooth silky perfection.
Step 3: Whisk in the Drippings Slowly
With the heat reduced to low, slowly whisk the turkey drippings into your roux. Go gradually, making sure the mixture stays lump-free. Keep whisking until the gravy is totally smooth. This part might take a couple minutes, but once it’s smooth, you’re almost there.
Step 4: Simmer and Adjust the Thickness
Bring the gravy to a gentle simmer while whisking constantly. It will start to thicken in about 6-8 minutes. Remember, it will thicken even more as it cools, so if it’s too thick for your liking, whisk in a little water, a tablespoon at a time, until you hit the perfect pourable consistency.
Step 5: Season to Perfection
Taste your gravy and adjust the salt and flavors. Since turkey drippings vary, I usually add granulated chicken bouillon a pinch at a time before adding salt, which helps deepen the savory bite without over-salting. From there, I sprinkle in a touch of dried parsley, garlic powder, onion powder, thyme, sage, rosemary, and fresh cracked pepper. Taste as you go—it’s all about what you like.
Step 6: Keep Warm and Serve
Gravy is at its silky best when warm, so time your prep accordingly. Keep it over low heat and stir occasionally until you’re ready to serve. I like to pour it into a warmed insulated gravy jug which keeps the temperature steady and encourages smooth, lump-free pours.
Top Tip
Over the years, I’ve learned a few secrets to making homemade turkey gravy that always comes out perfect. These are the little things that help you avoid common pitfalls and elevate your gravy to “restaurant quality.”
- Golden Roux First: Taking the time to cook your roux to a golden brown gives your gravy a slightly nutty flavor and prevents that raw flour taste.
- Slow Drippings Addition: Add your drippings gradually to keep lumps at bay—whisk like your life depends on it!
- Taste Early and Often: Because every turkey is different, I always season my gravy at the end—it’s how I get the perfect balance.
- Don’t Skip Resting: Allowing the fat to rise and removing it prevents greasy gravy—this step transformed my gravy game.
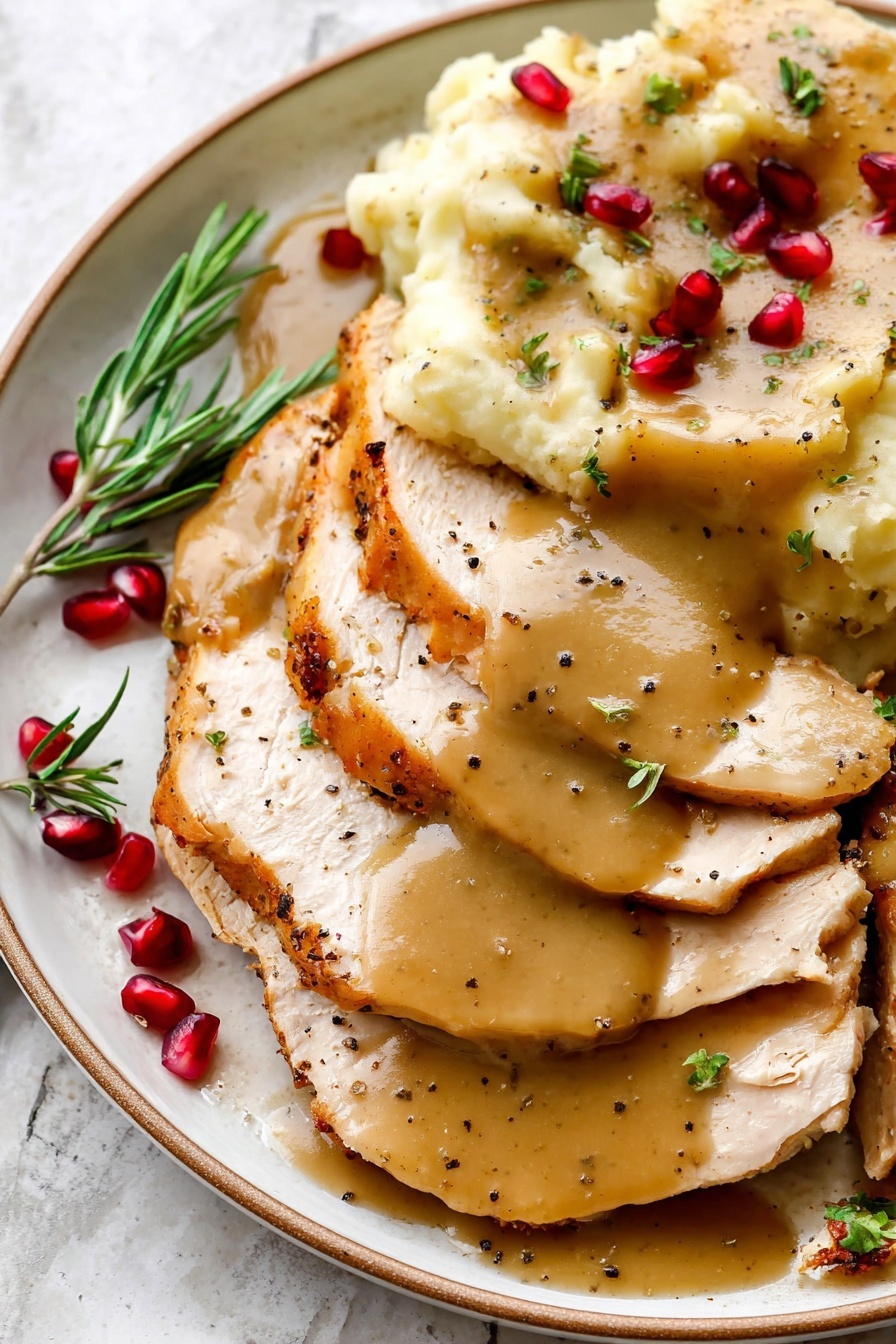
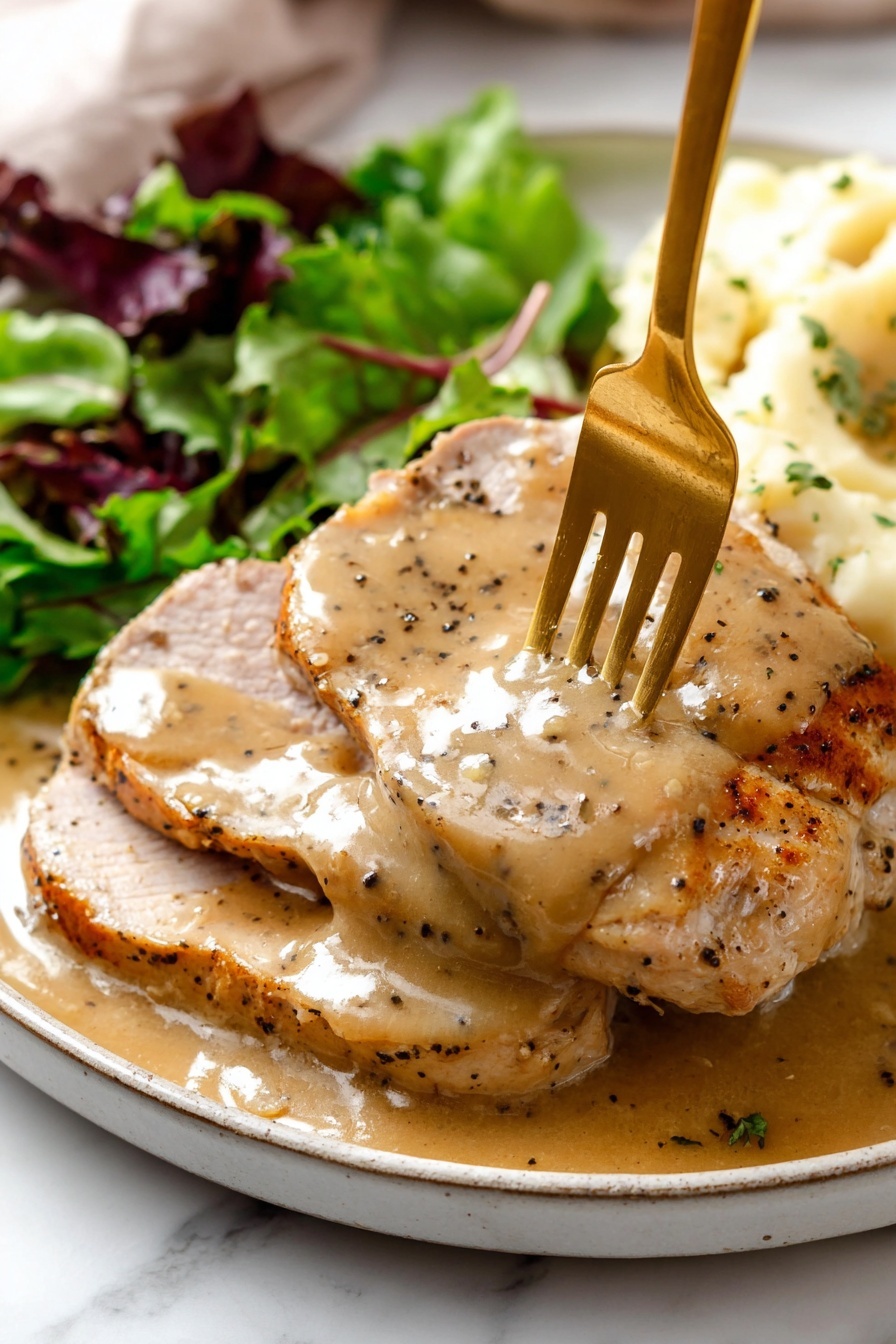
How to Serve Homemade Turkey Gravy from Drippings Recipe
Garnishes
I like to keep garnishes simple—just a sprinkle of freshly chopped parsley or thyme brightens the gravy and adds a welcome dash of color. Sometimes, if I’m feeling a little fancy, I’ll float a few crispy fried sage leaves on top. It’s a subtle touch but really adds that wow factor.
Side Dishes
This gravy pairs beautifully with classic mashed potatoes, roasted vegetables, and stuffing. I swear by serving it alongside buttery dinner rolls so everyone can sop up every last drop. It’s a cozy, comforting pairing that never disappoints.
Creative Ways to Present
For holiday dinners, I love pouring the gravy into a rustic ceramic gravy boat to complement my table setting. Another fun idea is to serve it in mini sauce pitchers for each guest—makes the presentation feel extra special and invites everyone to customize their plate just how they like.
Make Ahead and Storage
Storing Leftovers
I transfer leftover gravy to an airtight container and pop it in the fridge. It keeps well for up to four days. Just remember, it will thicken substantially as it chills, so don’t be alarmed when it looks dense in the container.
Freezing
Freezing this gravy is a lifesaver for later meals. I pour it into freezer-safe containers, squeezing out as much air as possible, and freeze for up to 3 months. When thawing overnight in the fridge, it comes back perfectly and tastes just like fresh.
Reheating
To reheat, I gently warm the gravy on the stovetop over medium-low heat. It often thickens overnight, so I whisk in small amounts of water until it reaches that ideal creamy flow. Stirring consistently helps keep it smooth and luscious.
Frequently Asked Questions:
Absolutely! You can prepare the gravy a few hours ahead and keep it warm on the stovetop, stirring occasionally to prevent a skin from forming. If needed, reheat gently and whisk in a little water to adjust the thickness before serving.
If you have limited drippings, supplement with water or low-sodium chicken broth to reach the 4 cups liquid needed. Adding a bit of granulated chicken bouillon can boost flavor when drippings are light.
The key to lump-free gravy is to cook the roux slowly to a golden color and whisk constantly when adding liquid. Adding the drippings or broth gradually and whisking thoroughly after each addition helps keep the texture silky smooth.
Yes! Homemade turkey gravy freezes well. Store it in an airtight container or freezer bag with minimal air and freeze for up to 3 months. Thaw overnight in the fridge and reheat gently on the stove with a splash of water to loosen the texture.
Final Thoughts
Honestly, I consider this Homemade Turkey Gravy from Drippings Recipe to be one of those kitchen magic moments. It’s simple, lovingly rich, and can turn any meal into a special occasion. I hope you find joy in making it as much as I do—because nothing beats the taste of gravy made with a little patience and a lot of love.
Print
Homemade Turkey Gravy from Drippings Recipe
- Prep Time: 5 minutes
- Cook Time: 15 minutes
- Total Time: 20 minutes
- Yield: 2.5 cups
- Category: Sauce
- Method: Stovetop
- Cuisine: American
Description
This homemade turkey gravy recipe uses flavorful drippings from your roasted turkey to create a rich, smooth gravy perfect for enhancing your holiday meal. The recipe includes instructions for making gravy both with and without turkey drippings, featuring a deeply golden roux base and customizable seasoning options.
Ingredients
Turkey Gravy with Drippings
- 6 tablespoons unsalted butter
- ⅓ cup + 1 tablespoon flour
- 4 cups turkey drippings plus water as needed
- Granulated chicken bouillon, as needed (optional)
- Seasonings as needed (dried parsley, garlic powder, onion powder, dried thyme, ground sage, dried rosemary, pepper)
Turkey Gravy without Drippings
- 6 tablespoons unsalted butter
- ⅓ cup + 1 tablespoon flour
- 4 cups reduced sodium chicken broth
- 1 teaspoon chicken bouillon (granulated, crushed cube, or base)
- 1 teaspoon dried parsley
- ½ teaspoon garlic powder
- ¼ teaspoon onion powder
- ¼ teaspoon dried thyme
- ¼ teaspoon pepper
- ⅛ teaspoon ground sage
- ⅛ teaspoon dried minced rosemary
- Salt to taste
Instructions
- Strain: Strain the turkey drippings from the roasting pan through a fine mesh sieve into a fat separator or large freezer bag, discarding solids caught in the sieve.
- Degrease: Allow drippings to rest so fat separates, then carefully pour off the bottom liquid into a measuring cup, leaving fat behind, until you have 4 cups of liquid.
- Make 4 cups liquid: Add water to the drippings if needed to total 4 cups of liquid.
- Make roux: Melt butter in a large saucepan over medium-low heat. Add flour and cook for 4-5 minutes, whisking constantly until deeply golden to prevent lumps.
- Add liquid: Reduce heat to low and slowly whisk in the drippings or chicken broth, whisking until smooth and lump-free.
- Simmer: Bring gravy to a simmer while whisking continuously, then simmer for 6-8 minutes until thickened to desired consistency.
- Season: Taste and add granulated chicken bouillon ¼ teaspoon at a time, or salt and other seasonings (dried parsley, garlic powder, onion powder, dried thyme, ground sage, dried rosemary, pepper) to your preference.
- Keep warm: Keep gravy warm on low heat, stirring often, until ready to serve to maintain smooth texture.
- Thin as needed: If gravy becomes too thick as it cools, whisk in additional water a little at a time to reach desired consistency.
Notes
- Store leftover gravy in an airtight container in the refrigerator for up to 4 days.
- Freeze leftover gravy in airtight containers or freezer bags for up to 3 months; thaw overnight in the refrigerator before reheating.
- Reheat gently on the stovetop, adding water as needed to thin to desired consistency, whisking until smooth.
- To prevent lumps in gravy, do not shortcut the roux cooking step; the flour must turn deeply golden.
- Use an insulated gravy jug to keep the gravy warm and smooth when serving.
Nutrition
- Serving Size: ¼ cup
- Calories: 80 kcal
- Sugar: 0 g
- Sodium: 150 mg
- Fat: 5 g
- Saturated Fat: 3 g
- Unsaturated Fat: 2 g
- Trans Fat: 0 g
- Carbohydrates: 7 g
- Fiber: 0 g
- Protein: 1 g
- Cholesterol: 15 mg


Leave a Reply