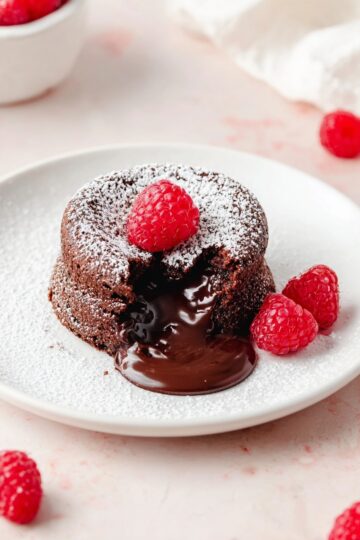
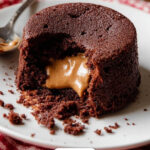
If you love the combo of rich chocolate and creamy peanut butter, you’re in for a treat with this Peanut Butter Chocolate Lava Cakes Recipe. Imagine a warm, molten center oozing peanut butter magic—pure indulgence that melts in your mouth sideways!

Jump to:
- Why You'll Love This Recipe
- Ingredients & Why They Work
- Make It Your Way
- Step-by-Step: How I Make Peanut Butter Chocolate Lava Cakes Recipe
- Top Tip
- How to Serve Peanut Butter Chocolate Lava Cakes Recipe
- Make Ahead and Storage
- Frequently Asked Questions:
- Final Thoughts
- Peanut Butter Chocolate Lava Cakes Recipe
Why You'll Love This Recipe
From the very first bite, I was hooked. This recipe feels fancy but comes together quickly, delivering that wow factor every time. Perfect for date nights, special occasions, or just because you deserve a little self-love in dessert form.
- Molten Center Magic: Each cake hides a luscious peanut butter core that oozes out when cut.
- Simple Ingredients: No complicated or hard-to-find items—mostly pantry staples.
- Quick Bake Time: Ready in under 35 minutes, making it perfect for last-minute dessert cravings.
- Customizable Serving: Pair with ice cream, drizzle with chocolate or more peanut butter for extra decadence.
Ingredients & Why They Work
When shopping for ingredients, I recommend picking high-quality chocolate and a creamy commercial peanut butter for the best results. These choices make a real difference in flavor and texture, elevating a simple lava cake into a next-level dessert.
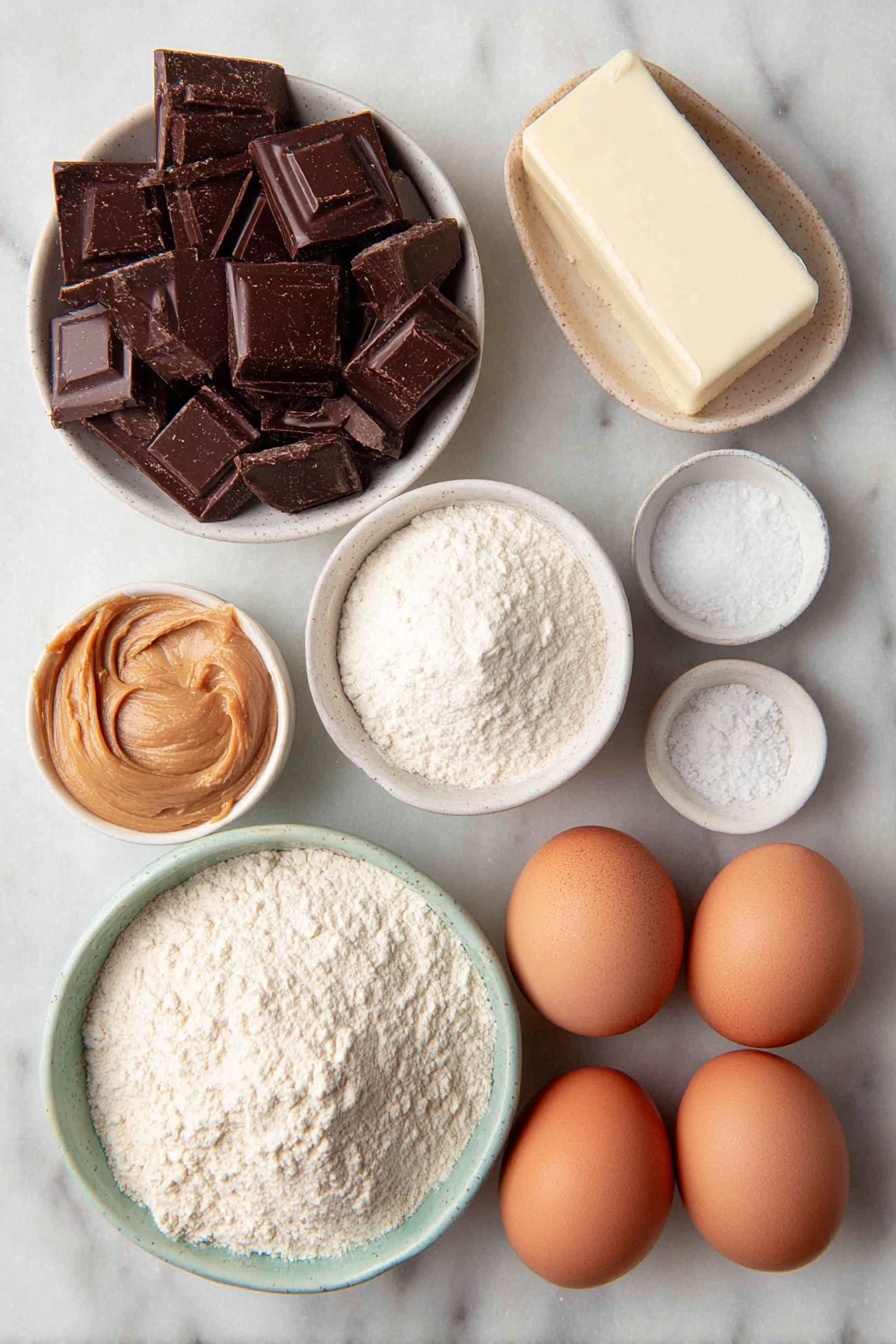
- Semi-sweet chocolate: I go for premium brands like Ghirardelli or Lindt because their melting quality and depth of flavor are unbeatable.
- Unsalted butter: This enriches the batter without adding extra saltiness, helping balance the sweet and rich flavors.
- All-purpose flour: Just enough to hold the structure but keep it tender and gooey inside.
- Confectioners’ sugar: Gives smooth sweetness and a light texture to the cake.
- Salt: A tiny pinch enhances all the chocolatey goodness.
- Large eggs and egg yolks: They add richness and help create the perfect cake crumb.
- Creamy peanut butter: Use a commercial creamy brand like Jif or Skippy for that classic smooth texture and flavor—no natural or crunchy styles!
- Optional for serving: Ice cream or drizzles of melted peanut butter or chocolate syrup to take these cakes over the top.
Make It Your Way
Peanut Butter Chocolate Lava Cakes are already a dreamy fusion of flavors, but the fun really begins when you start personalizing them. Whether you want to tweak the peanut butter intensity or add a seasonal twist, this recipe welcomes your creativity with open arms!
- Peanut Butter Swap: I always stick to creamy commercial peanut butter like Jif or Skippy because it melts perfectly and gives that luscious texture inside the cake. Natural or crunchy peanut butter tends to disrupt the smoothness and can make the center less gooey, so I’d recommend skipping those for this recipe.
- Plain Chocolate Lava Cake: If you’re not a peanut butter fan or want a classic molten chocolate experience, simply omit the peanut butter altogether. Bake it for the same 12-13 minutes, and you’ll have an irresistibly rich chocolate lava cake every time.
- Serving Style: I love serving these warm with a scoop of vanilla ice cream, plus a drizzle of melted peanut butter and chocolate syrup. It’s pure decadence! For a seasonal flair, try adding a sprinkle of sea salt or some crushed roasted peanuts on top for added texture.
- Alternative Bakeware: No ramekins? No problem! Using a muffin pan works beautifully, too. Just grease and dust the cups with cocoa powder and bake for 8-10 minutes at 425°F to create 6 smaller lava cakes perfect for sharing.
Step-by-Step: How I Make Peanut Butter Chocolate Lava Cakes Recipe
Step 1: Prepping Your Ramekins for a Seamless Release
First things first, spray your four 6-ounce ramekins thoroughly with nonstick cooking spray. Then dust them lightly but evenly with cocoa powder. This little step is a game changer—it creates a smooth surface that helps the cakes slide right out when you invert them later. Trust me, it saves you from some frustrating moments!
Step 2: Heat Things Up — Preheating the Oven
Preheat your oven to a toasty 425°F (218°C). This high temperature is the secret to getting the outside of your cakes firm while keeping the inside molten and dreamy. While it warms up, you can move on to melting your chocolate and butter.
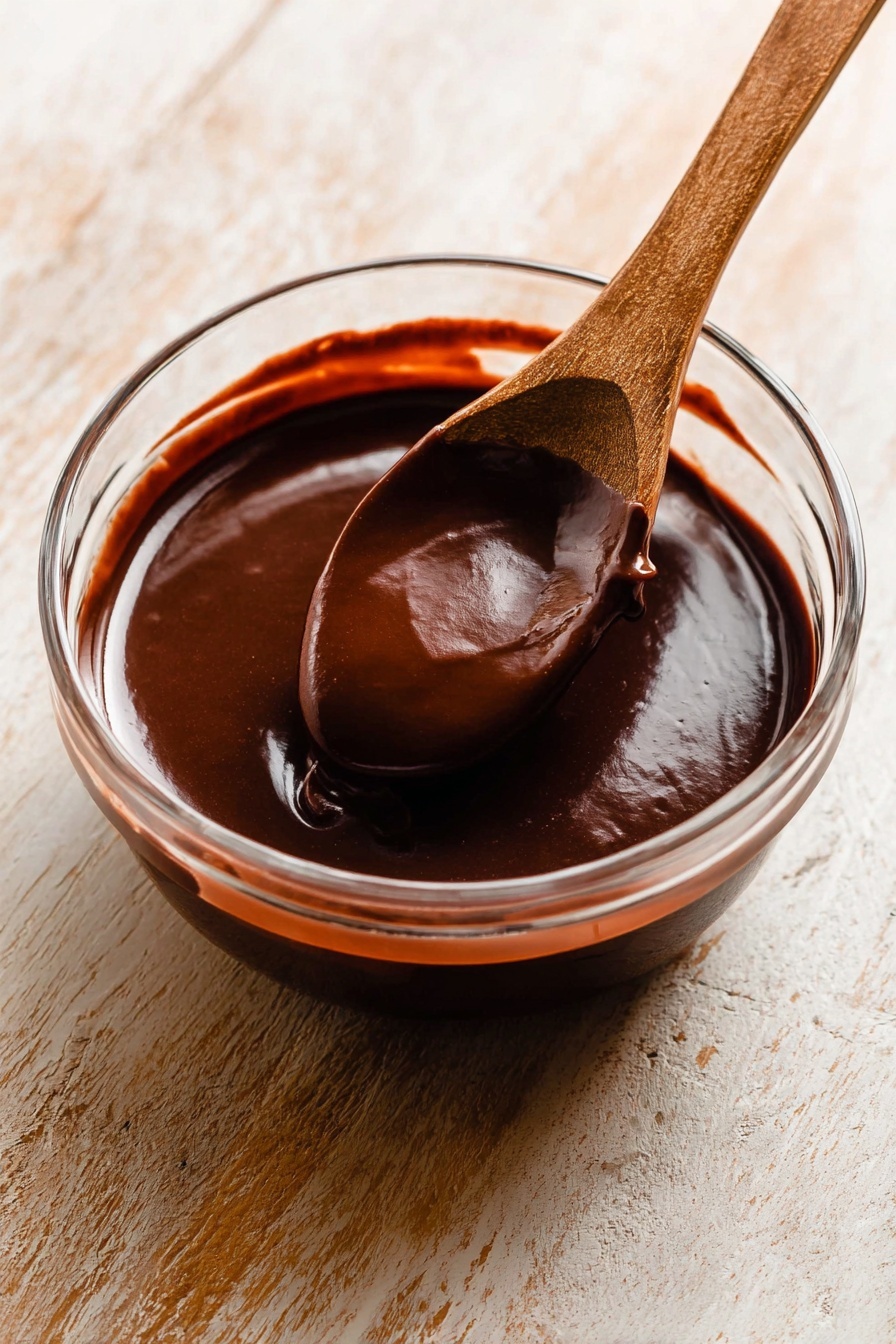
Step 3: Melting Chocolate and Butter to Velvety Perfection
Coarsely chop 6 ounces of semi-sweet chocolate (I like Ghirardelli or Lindt for extra richness) and place it on top of ½ cup of unsalted butter in a medium heat-proof bowl. Microwave it in 10-second bursts on high, stirring between each, until the chocolate and butter are completely melted and smooth. Be patient here—this smooth, glossy base is what makes the batter shine. Set it aside to cool just a tad before moving on.
Step 4: Whisk Dry Ingredients and Eggs Separately
In a small bowl, whisk together ¼ cup flour, ½ cup confectioners’ sugar, and ⅛ teaspoon salt until combined. In another bowl, whisk 2 large eggs and 2 large egg yolks until smooth and uniform. This separation keeps things organized so you can blend everything together with perfect texture in the next step.
Step 5: Bring It All Together — Create That Thick Batter
Slowly add your flour mixture and eggs into the bowl with the melted chocolate and butter. Gently stir everything with a silicone spatula or wooden spoon until the batter is smooth and thick — no lumps! If you spot any pesky clumps, a quick gentle whisk will fix it. You want a luscious consistency that’ll bake beautifully into molten magic.
Step 6: Fill, Drop, and Nestle the Peanut Butter
Evenly spoon the chocolate batter into the prepared ramekins, filling each about three-quarters full. Then, drop 2 teaspoons of creamy peanut butter on top of each batter portion. Use the back of a spoon to gently press the peanut butter into the batter, but leave some peanut butter peeking out for that perfect molten center.
Step 7: Bake Your Way to Gooey Heaven
Place your ramekins on a baking sheet and slide them into the 425°F oven. Bake for 12 to 13 minutes. You’ll know they’re ready when the sides look firm and set, while the tops remain just slightly soft to the touch. Timing is everything here — so watch closely to avoid overbaking and losing that luscious molten heart.
Step 8: Cool, Flip, and Serve Immediately
Once baked, let the cakes cool for just 1 minute — enough so they set slightly but remain warm inside. Then cover each ramekin with an inverted plate, don your oven mitts, and carefully flip the cakes out. They should come out clean and intact, revealing the molten peanut butter center. Serve up right away with your favorite ice cream or drizzles of melted peanut butter and chocolate syrup. Enjoy every molten bite!
Top Tip
These tips will help you nail the perfect molten center and that dreamy peanut butter swirl every single time. After making this Peanut Butter Chocolate Lava Cakes Recipe a few times myself, I've found these tricks make all the difference!
- Perfect Ramekin Prep: I always spray the ramekins thoroughly with nonstick spray and dust them with cocoa powder – trust me, it’s the secret to that flawless cake release when inverting them.
- Don’t Skip Cooling: Let the cakes cool just 1 minute after baking. I learned that rushing to flip them while still piping hot can cause the molten center to leak or the cake to break.
- Peanut Butter Portioning: Use a teaspoon measure (2 teaspoons per cake) to evenly portion the creamy commercial peanut butter like Jif or Skippy. It guarantees a gooey, well-distributed peanut butter core.
- Watch Your Bake Time: Baking one minute too long will cook out that luscious lava effect. I’ve learned 12-13 minutes at 425°F is the sweet spot for 6-ounce ramekins.
How to Serve Peanut Butter Chocolate Lava Cakes Recipe
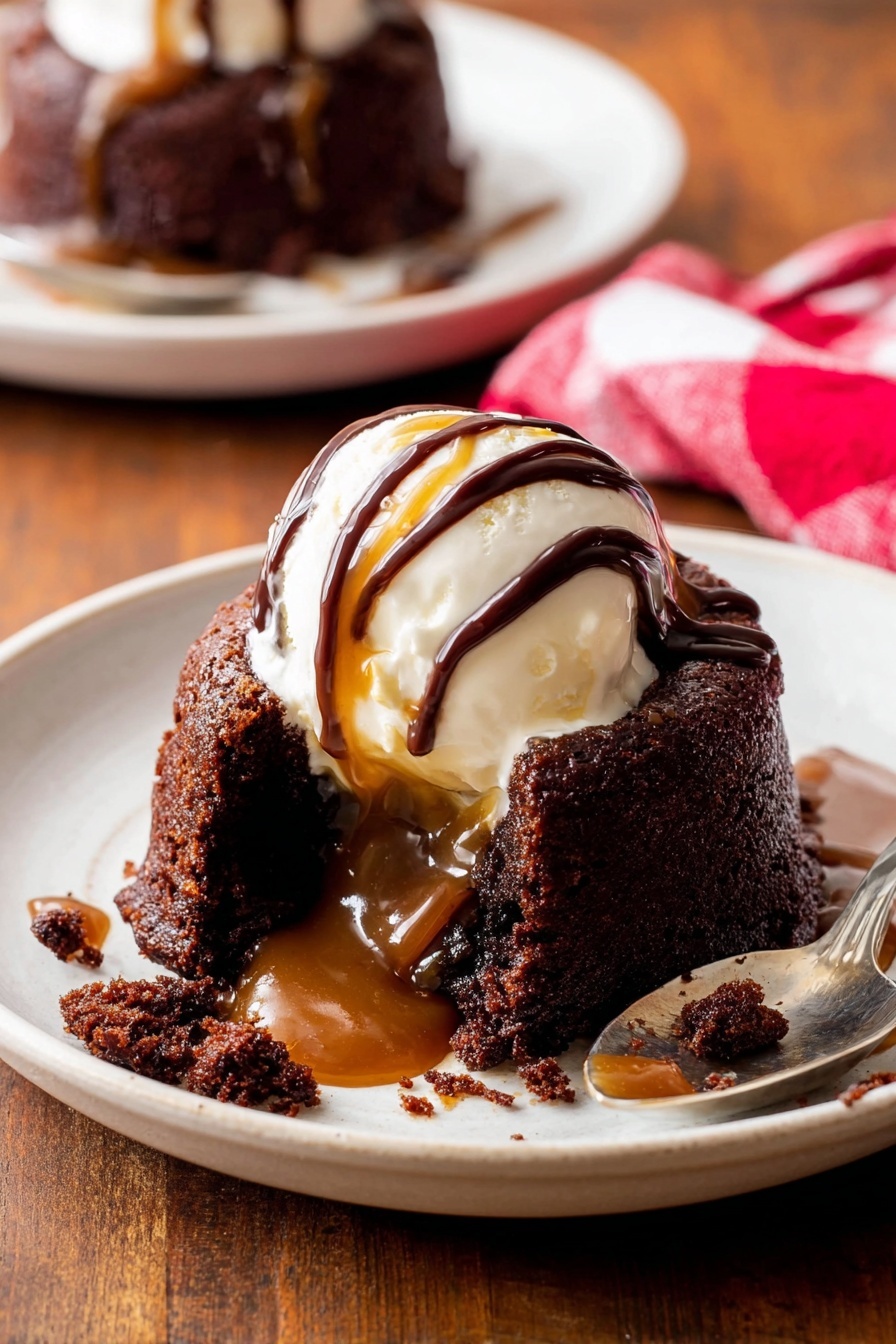
Garnishes
To elevate these decadent peanut butter chocolate lava cakes, try topping them with a scoop of creamy vanilla ice cream – the cold and warm contrast is incredible. You can also drizzle melted peanut butter or chocolate syrup for added richness and visual appeal. For a pop of freshness, sprinkle a few flaky sea salt crystals or a dusting of confectioners’ sugar.
Side Dishes
These individual lava cakes shine as a standalone dessert, but pairing them with fresh berries like raspberries or sliced strawberries adds a juicy contrast that balances the richness perfectly. If you want to offer a lighter palate cleanser, a small bowl of lemon sorbet or a mint sprig also works beautifully alongside.
Make Ahead and Storage
Storing Leftovers
If you have any leftover Peanut Butter Chocolate Lava Cakes, store them covered in the refrigerator. They keep well for up to 2 days. Just be sure to cover tightly to prevent them from drying out or absorbing fridge odors.
Freezing
You can freeze the baked lava cakes after they've completely cooled. Wrap each cake individually in plastic wrap and then place them in an airtight container or freezer bag. They freeze well for up to 1 month. When ready to enjoy, thaw overnight in the refrigerator.
Reheating
To bring back that molten lava texture after refrigeration or freezing, microwave each cake on high for about 20-25 seconds. This reheats the center so it’s deliciously gooey again—just be careful not to overheat or they’ll firm up too much.
Frequently Asked Questions:
For the best texture and flavor, stick with creamy commercial peanut butter brands like Jif or Skippy. Natural or crunchy peanut butter can alter the molten center's consistency and won’t melt as smoothly.
You can use a muffin pan as an alternative—grease and dust 6 cups with cocoa powder. Bake at 425°F (218°C) for 8-10 minutes for smaller cakes (yields about 6). Just note the baking time differs from ramekins and results in smaller portions.
Absolutely! Prepare the batter up through mixing all ingredients in step 6, refrigerate it covered for up to 1 day, then bring it to room temperature before filling your ramekins and baking.
When baked for 12-13 minutes at 425°F, the edges and sides should be firm while the top remains slightly soft and jiggly—this means the molten center is perfectly gooey.
Final Thoughts
Making the perfect Peanut Butter Chocolate Lava Cakes Recipe is such a joy—there's something magical about cutting into that warm cake and seeing the molten peanut butter-chocolate center ooze out. Whether you whip these up for a special occasion or just because, they're bound to impress and satisfy any sweet tooth. Enjoy every luscious, gooey bite!
Print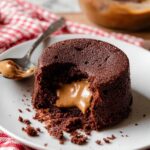
Peanut Butter Chocolate Lava Cakes Recipe
- Prep Time: 15 minutes
- Cook Time: 13 minutes
- Total Time: 35 minutes
- Yield: 4 cakes
- Category: Dessert
- Method: Baking
- Cuisine: American
- Diet: Vegetarian
Description
Decadent Peanut Butter Chocolate Lava Cakes featuring a rich molten center with creamy peanut butter, perfect for a decadent dessert that melts in your mouth. These individual cakes combine semi-sweet chocolate and smooth peanut butter for an indulgent treat served warm with optional ice cream or drizzles.
Ingredients
Main Ingredients
- 6 ounces high quality semi-sweet chocolate (such as Ghirardelli or Lindt)
- ½ cup (8 Tbsp; 113g) unsalted butter
- ¼ cup (31g) all-purpose flour (spooned & leveled)
- ½ cup (60g) confectioners’ sugar
- ⅛ teaspoon salt
- 2 large eggs
- 2 large egg yolks
- 8 teaspoons (42g) creamy peanut butter (about 2 teaspoons per cake; commercial brand like Jif or Skippy recommended)
Optional for Serving
- Ice cream
- Melted peanut butter
- Chocolate syrup
Instructions
- Prepare Ramekins: Spray four 6-ounce ramekins with nonstick cooking spray and dust them evenly with cocoa powder to ensure easy cake release after baking.
- Preheat Oven: Set your oven to 425°F (218°C) to preheat while you prepare the batter.
- Melt Chocolate and Butter: Coarsely chop the chocolate and place it over the butter in a medium heat-proof bowl. Microwave in 10-second increments, stirring between each until completely smooth and melted. Set aside to cool slightly.
- Mix Dry Ingredients: In a small bowl, whisk together the flour, confectioners’ sugar, and salt until well combined.
- Mix Eggs: In a separate small bowl, whisk the whole eggs and egg yolks together until uniformly combined.
- Combine Batter: Gradually add the dry ingredients and eggs into the melted chocolate bowl. Gently stir using a silicone spatula or wooden spoon until smooth and thick, whisking gently to remove any lumps.
- Fill Ramekins: Evenly spoon the chocolate batter into the prepared ramekins. Drop 2 teaspoons of creamy peanut butter atop each and gently press into the batter, leaving some exposed.
- Bake: Place all ramekins on a baking sheet and bake for 12-13 minutes until the sides are firm but the top remains slightly soft.
- Cool and Invert: Let cakes cool for 1 minute. Cover each ramekin with an inverted plate, then carefully flip over using oven mitts to remove the cakes. They should release easily.
- Serve: Optionally top with ice cream, drizzle with melted peanut butter or chocolate syrup, and serve immediately for the best molten experience.
Notes
- Make Ahead: Batter can be prepared through combining all ingredients in step 6 and stored covered in the refrigerator for up to 1 day. Bring to room temperature before proceeding to step 7.
- Peanut Butter: Use only creamy commercial peanut butter brands like Jif or Skippy. Avoid natural or crunchy styles and other nut butters for best texture and flavor.
- Ramekin Size: Standard 6-ounce ramekins recommended for accurate bake time. Using other sizes may alter cook time and outcome.
- Alternative Bakeware: Muffin pans can be used—grease and dust cups with cocoa powder, bake at 425°F for 8-10 minutes, produce 6 smaller lava cakes.
- Plain Version: Omit peanut butter entirely and bake for 12-13 minutes for classic chocolate lava cakes.
- Special Equipment: 6-ounce ramekins, whisk, silicone spatula or wooden spoon, microwave-safe bowl, baking sheet.
Nutrition
- Serving Size: 1 cake
- Calories: 390 kcal
- Sugar: 25 g
- Sodium: 95 mg
- Fat: 28 g
- Saturated Fat: 12 g
- Unsaturated Fat: 14 g
- Trans Fat: 0.2 g
- Carbohydrates: 34 g
- Fiber: 3 g
- Protein: 7 g
- Cholesterol: 145 mg
Leave a Reply