Nothing says love quite like homemade treats, and this Valentine’s Heart Cookie Slice and Bake Recipe is a true celebration of that. Tender, buttery dough tinted a vibrant red and rolled in festive sprinkles makes for cookies that are as charming as they are delicious.

Jump to:
- Why You'll Love This Recipe
- Ingredients & Why They Work
- Make It Your Way
- Step-by-Step: How I Make Valentine’s Heart Cookie Slice and Bake Recipe
- Top Tip
- How to Serve Valentine’s Heart Cookie Slice and Bake Recipe
- Make Ahead and Storage
- Frequently Asked Questions:
- Final Thoughts
- Valentine’s Heart Cookie Slice and Bake Recipe
Why You'll Love This Recipe
I have to admit, there’s something incredibly satisfying about making slice and bake cookies, especially when they turn out looking like perfect little stacked hearts. These cookies deliver on taste, texture, and that all-important visual wow factor.
- Easy to slice and bake: The dough log can be chilled and sliced ahead, giving you stress-free cookie prep on Valentine’s Day.
- Beautiful presentation: The stacked heart design makes every cookie a delightful little work of art.
- Perfect texture balance: Crisp edges with a soft, buttery center means you get the best bite every time.
- Festive crunch: Rolling the cookie log in pink and white sprinkles adds a fun, crunchy texture and visual pop.
Ingredients & Why They Work
When it comes to Valentine’s cookies, choosing quality ingredients really makes all the difference. For this recipe, I recommend European-style butter for richness, and a good vanilla bean paste for that deep, authentic vanilla flavor that shines through.
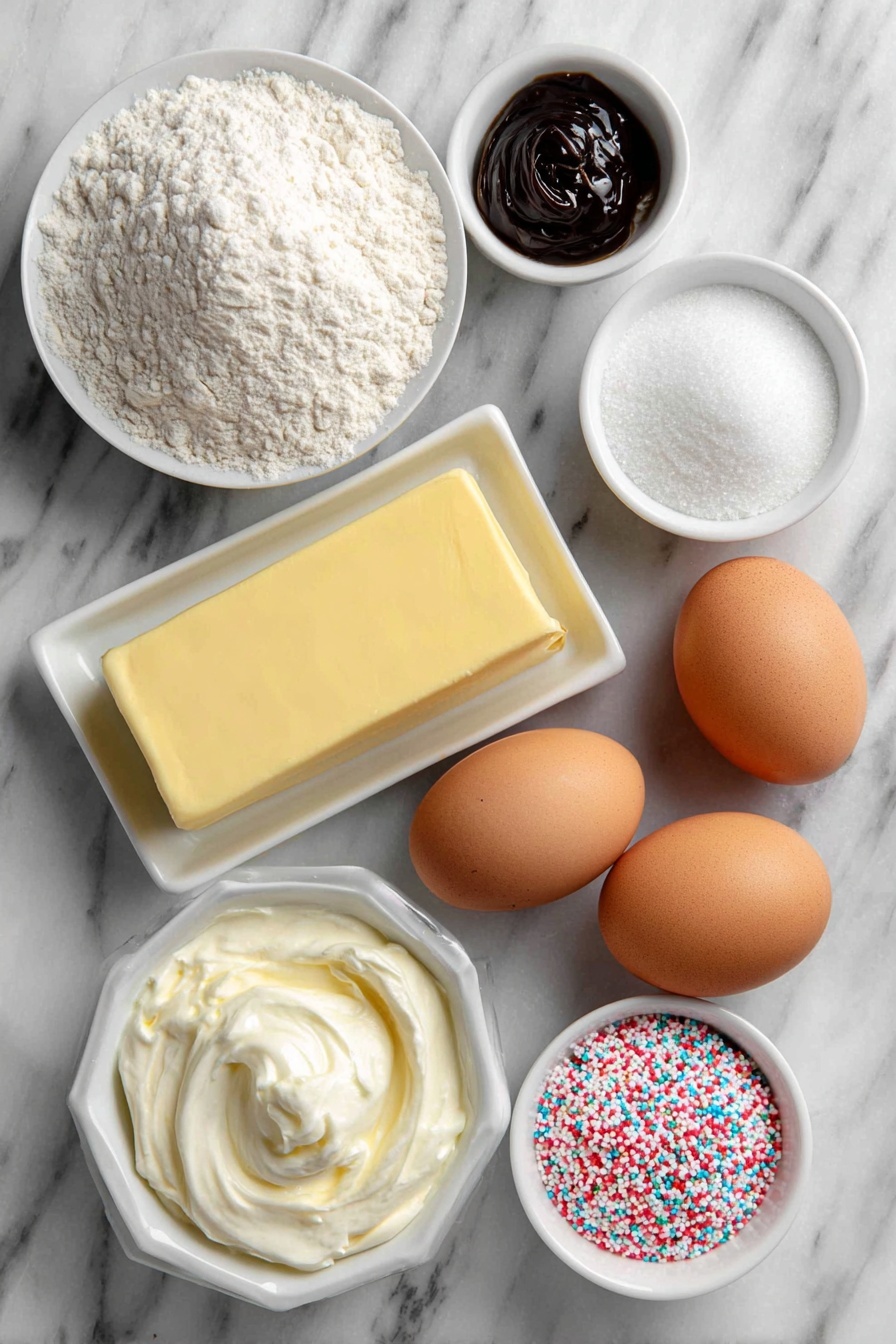
- All-purpose flour: Provides the ideal structure for tender yet sturdy cookies, essential for maintaining the heart shapes.
- Baking powder: Just a hint helps lighten the dough so the cookies aren’t too dense.
- Fine sea salt: Enhances the buttery flavor and balances the sweetness perfectly.
- Unsalted European butter: The higher fat content gives these cookies their signature rich, tender crumb.
- Granulated sugar: Sweetens the dough and helps achieve that light, fluffy creamed texture.
- Large eggs and egg yolk: Add moisture, richness, and help bind the dough without making it cakey.
- Heavy cream: Boosts tenderness and adds a subtle silkiness to the dough.
- Vanilla bean paste: The real deal for bold, sweet vanilla flavor over imitation extracts.
- Red gel food coloring: Concentrated color that won’t thin your dough, perfect for that festive Valentine’s red.
- Pink and white jimmy sprinkles: These give the outside of the cookie log a delightful crunch and extra festive charm.
Make It Your Way
One of the best things about the Valentine’s Heart Cookie Slice and Bake Recipe is how easy it is to put your own spin on it. Whether you want to tweak colors, textures, or flavors, this cookie canvas welcomes your creativity!
- Try Different Colors: Instead of classic red or pink, I sometimes mix in a little purple or even a soft coral gel food coloring with the dough to match different Valentine’s vibes. It’s so fun to see how a simple color shift changes the whole mood of the cookies!
- Gluten-Free Twist: For those avoiding gluten, substituting the all-purpose flour with a 1:1 gluten-free baking blend works well—just keep an eye on the dough's texture and chill it a little longer if needed.
- Decorate Differently: I love swapping the pink and white jimmy sprinkles for a mix of sanding sugar and tiny white chocolate pearls for a more elegant look. You can also add edible glitter for extra sparkle on your special day.
- Make It Vegan: Replace the butter with a dairy-free margarine, and swap the egg and yolk for flax eggs or a commercial egg replacer. Use coconut cream instead of heavy cream to keep the dough tender and luscious.
Step-by-Step: How I Make Valentine’s Heart Cookie Slice and Bake Recipe
Step 1: Whisk Together the Dry Ingredients
Start by combining your flour, baking powder, and salt in a small bowl. Whisk these dry ingredients until they’re well blended—this guarantees that your baking powder and salt are evenly distributed throughout the dough. Set it aside for the moment, and don’t forget to measure carefully using the spoon-level method or a kitchen scale to avoid any surprises in texture!
Step 2: Cream the Butter and Sugar Until Fluffy
In a mixing bowl, beat your cool room temperature European butter with the granulated sugar. This step takes about 3 minutes with an electric mixer on medium speed. You want the mixture to become light and fluffy—this is key for those tender, melt-in-your-mouth cookies. Don’t forget to scrape the sides of your bowl occasionally to keep everything evenly blended.
Step 3: Add Eggs, Cream, and Vanilla for Richness
Next, mix in the whole egg, egg yolk, heavy cream, and vanilla bean paste. These ingredients add richness and flavor while helping bind the dough together. Mix until just combined—over-mixing can make the cookies tough, so keep an eye on the texture as it comes together.
Step 4: Gently Incorporate the Dry Mixture
Now pour your dry ingredients into the wet mixture gradually, folding or mixing at low speed until just combined. You want to avoid overworking the dough here to keep your cookies tender and buttery. Once the flour disappears into the wet mixture, stop mixing.
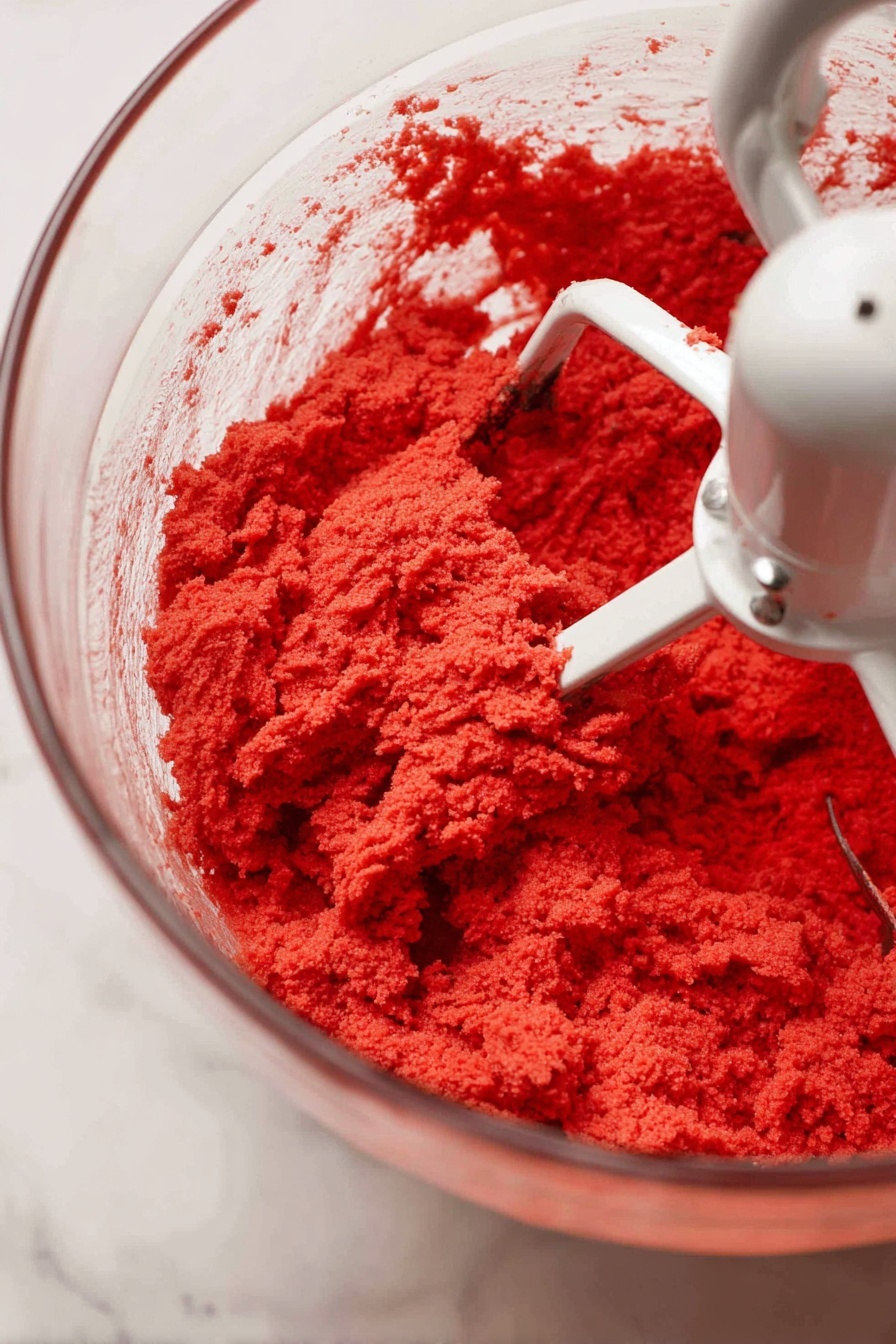
Step 5: Color Half the Dough and Chill
Separate about half the dough (roughly 375-400 grams). Add red gel food coloring to that portion and mix thoroughly until you have a beautiful vibrant pink or red. Roll this tinted dough between parchment sheets to about ½ inch thick, then freeze it for 10 minutes—this makes it firmer and easier to cut cleanly. Meanwhile, cover and keep the remaining plain dough at room temperature wrapped in plastic.
Step 6: Cut, Stack, and Freeze the Heart Shapes
Using a 1 ½-inch heart-shaped cookie cutter, cut as many hearts as possible from the chilled red dough. Don’t waste those scraps—reroll them once to maximize your use. Lightly moisten each heart’s center with water, then stack two hearts together gently pressing to adhere. Arrange your stacked hearts into a neat log about 9 to 10 inches long on parchment paper, then pop it into the freezer for at least 30 minutes to get firm.
Step 7: Wrap the Heart Log with Plain Dough and Chill
Remove the frozen heart log from the freezer. Carefully wrap the plain, room temperature dough around it, covering all gaps for a smooth appearance. Then tightly wrap the entire log in plastic wrap and roll with your hands to create an even cylinder. Refrigerate this log for at least 2 to 3 hours — or better yet, overnight — so it firms up perfectly for slicing.
Step 8: Prep, Slice, and Bake Your Cookies
When you’re ready, preheat your oven to 350°F (180°C). Unwrap the chilled dough log and roll it gently in pink and white jimmy sprinkles to coat the outside. Slice the log into roughly ½-inch-thick rounds, placing them on a parchment-lined baking sheet spaced slightly apart. Bake for about 12 minutes, or until the cookie bottoms are lightly golden and the tops look matte. For those who love a bit more crunch, slice thinner (about ¼ inch) and bake a little longer, watching closely to avoid burning.
Step 9: Cool and Enjoy Your Festive Treats
Once baked, transfer the cookies to a wire rack and cool completely. This helps them firm up just right, so they’re perfect for gifting, sharing, or enjoying alongside a cup of tea or coffee. The combo of buttery edges with soft, slightly chewy centers is pure Valentine's Day magic!
Top Tip
These Valentine’s Heart Cookie Slice and Bake Recipe tips will help you get picture-perfect hearts with a tender, buttery crumb and a festive crunch every single time you bake them.
- Perfect Butter Temperature: Use cool room temperature butter, ideally between 64-68°F. This helps you achieve the right dough texture without it becoming greasy or too soft to handle.
- Chill and Freeze for Shape: Don’t skip the chilling steps! Freezing the red dough and the assembled heart log ensures clean, crisp heart shapes that slice beautifully without squishing.
- Sprinkle Coating: When rolling the cookie log in sprinkles, be gentle but thorough—this adds that perfect festive crunch and makes the cookies visually pop.
- Slice Thickness Matters: For a tender middle with crisp edges, slice the cookie log about ½ inch thick. Slice thinner for an extra crunch but watch baking time carefully to avoid burning.
How to Serve Valentine’s Heart Cookie Slice and Bake Recipe

Garnishes
These charming heart cookies shine on their own, but a light dusting of powdered sugar or a drizzle of melted white or dark chocolate makes for a pretty finishing touch. You can even add a few fresh berries or edible rose petals alongside for an elegant Valentine’s Day platter.
Side Dishes
Serve your cookies with a warm cup of herbal tea, a rich hot chocolate, or a creamy latte for a cozy treat. For a festive party, pair them with a scoop of vanilla bean ice cream or a dollop of whipped cream to complement the buttery crunch.
Make Ahead and Storage
Storing Leftovers
Store cooled Valentine’s Heart Cookies in an airtight container at room temperature for up to 5 days. This keeps them crisp on the edges with a soft center, perfect for snacking throughout the week.
Freezing
Unbaked cookie logs can be frozen wrapped tightly in plastic wrap for up to 1 month. When you’re ready, thaw overnight in the refrigerator, then slice and bake fresh. Baked cookies can also be frozen in an airtight container for up to 2 months; just thaw at room temperature before serving.
Reheating
If you prefer warm cookies, pop them in a preheated 300°F (150°C) oven for 3-5 minutes. This refreshes their crisp edges and soft centers without drying them out.
Frequently Asked Questions:
Gel food coloring is best because it provides vibrant color without altering the dough’s consistency. Powdered coloring may not blend as evenly and can affect texture, so gel is recommended for this recipe.
Lightly moisten the center of each red heart with water before stacking and gently press them together. This acts like a glue without making the dough soggy, ensuring the hearts stay perfectly stacked in the log.
You can try substituting a gluten-free all-purpose flour blend that’s suitable for baking. However, results may vary, especially in dough texture and rolling, so proceed with caution and consider testing a small batch first.
A small round cutter or any festive shape will work—just adjust your expectations on the final look. Alternatively, you can carefully cut heart shapes freehand with a small paring knife for a personal touch.
Final Thoughts
Making these Valentine’s Heart Cookie Slice and Bake Recipe cookies is a delightful way to share love — both in the kitchen and on the table. The steps may seem detailed, but the result is worth every moment: buttery, tender, and heartwarming cookies that look as thoughtful as they taste. I hope these cookies bring you as much joy baking them as your loved ones will tasting them. Happy baking, and Happy Valentine’s Day!
Print
Valentine’s Heart Cookie Slice and Bake Recipe
- Prep Time: 3 hours
- Chilling and Freezing Time: 3 hours
- Cook Time: 12 minutes
- Total Time: 3 hours 12 minutes
- Yield: 20 cookies
- Category: Dessert
- Method: Baking
- Cuisine: American
- Diet: Vegetarian
Description
These Valentine’s Slice and Bake Heart Cookies are a charming and delicious treat perfect for celebrating love. Featuring a tender buttery dough tinted with vibrant red food coloring, these stacked heart cookies are rolled in festive pink and white sprinkles for a delightful crunch and visual appeal. The recipe involves chilling and freezing steps to ensure the perfect sliceable log, yielding beautifully shaped cookies that are crisp on the edges and soft inside.
Ingredients
Dry Ingredients
- 2 ½ cups all-purpose flour
- ½ teaspoon baking powder
- 1 teaspoon fine sea salt
Wet Ingredients
- 14 tablespoons unsalted European butter, cool room temperature
- 1 cup granulated sugar
- 1 large egg, room temperature
- 1 large egg yolk, room temperature
- 2 tablespoons heavy cream, room temperature
- 1 tablespoon vanilla bean paste
- Red gel food coloring, amount as needed
Decorations
- ½-1 cup pink and white jimmy sprinkles
Instructions
- Combine Dry Ingredients: In a small bowl, whisk together the all-purpose flour, baking powder, and fine sea salt until evenly mixed. Set this bowl aside.
- Cream Butter and Sugar: In a mixing bowl, beat the cool room temperature butter and granulated sugar together until the mixture is light and fluffy, which usually takes about 3 minutes. Scrape down the sides of the bowl to ensure even mixing.
- Add Eggs and Flavorings: Incorporate the large egg, egg yolk, heavy cream, and vanilla bean paste into the creamed butter and sugar. Mix until combined.
- Mix in Dry Ingredients: Gradually add the dry flour mixture to the wet ingredients, mixing until just combined to form the cookie dough.
- Divide and Color Dough: Separate about half of the dough (around 375-400 grams) in the mixing bowl. Add red gel food coloring to this portion and mix thoroughly until you reach your desired shade of pink or red.
- Chill Colored Dough: Roll the tinted dough between two sheets of parchment paper to about ½ inch thickness and freeze for 10 minutes to firm it up. Meanwhile, cover the remaining plain dough with plastic wrap and set aside at room temperature.
- Cut and Stack Hearts: Using a 1 ½-inch heart-shaped cookie cutter, cut hearts from the chilled red dough. Re-roll scraps once to maximize dough use. Lightly moisten the center of each red heart with water and stack two hearts together, pressing gently to adhere. Arrange these stacked hearts to form a single log about 9–10 inches long on a parchment-lined baking sheet.
- Freeze Heart Log: Place the heart log in the freezer for at least 30 minutes until it becomes firm.
- Wrap with Plain Dough: Remove the heart log from the freezer. Wrap the remaining plain dough evenly around the heart log, covering all gaps. Wrap the entire log tightly in plastic wrap and use your hands to roll it into a smooth, even log shape.
- Chill the Cookie Log: Refrigerate the wrapped dough log for at least 2 to 3 hours or preferably overnight to allow the dough to firm up for slicing.
- Prepare to Bake: Preheat the oven to 350°F (180°C). Unwrap the chilled dough log and roll it carefully in pink and white jimmy sprinkles to coat the exterior evenly.
- Slice and Arrange Cookies: Slice the log into approximately ½-inch thick cookies. Arrange the cookie slices on a parchment-lined baking sheet, spacing them slightly apart.
- Bake the Cookies: Bake the cookies in the preheated oven for 12 minutes or until the bottoms are lightly golden and the tops have a matte finish. For crisper cookies, bake a bit longer while monitoring to avoid burning.
- Cool: Remove the cookies from the oven and transfer them to a wire rack to cool completely before serving or storing.
Notes
- Measure your dry ingredients properly using the spoon-level method or a kitchen scale to avoid using too much flour, which can make cookies dense.
- Ensure the butter is cool room temperature, ideally between 64-68°F, to achieve the right dough texture.
- You can substitute sprinkles for sanding sugar, pearls, or any festive mix for a different decorative effect.
- For crispier cookies, slice the dough log thinner, about ¼ inch thick, before baking.
- The dough requires several chilling and freezing steps to maintain the structure of the heart shapes and enable easy slicing.
Nutrition
- Serving Size: 1 cookie
- Calories: 150 kcal
- Sugar: 10 g
- Sodium: 90 mg
- Fat: 8 g
- Saturated Fat: 5 g
- Unsaturated Fat: 3 g
- Trans Fat: 0 g
- Carbohydrates: 18 g
- Fiber: 0.5 g
- Protein: 2 g
- Cholesterol: 45 mg


Leave a Reply