There’s something joyfully nostalgic about mixing up a batch of rocky road, and this twist is no exception. The creamy sweetness of white chocolate combined with the crunch of pistachios makes this White Chocolate Rocky Road with Pistachios Recipe a standout treat that's both festive and deliciously addictive.

Jump to:
- Why You'll Love This Recipe
- Ingredients & Why They Work
- Make It Your Way
- Step-by-Step: How I Make White Chocolate Rocky Road with Pistachios Recipe
- Top Tip
- How to Serve White Chocolate Rocky Road with Pistachios Recipe
- Make Ahead and Storage
- Frequently Asked Questions:
- Final Thoughts
- White Chocolate Rocky Road with Pistachios Recipe
Why You'll Love This Recipe
I honestly can’t get enough of this White Chocolate Rocky Road with Pistachios Recipe. It’s so simple to make and perfect for when you want a quick festive dessert or an indulgent snack that impresses without fuss. Plus, sharing it always sparks compliments and requests for the recipe.
- Effortless yet impressive: No baking skills required, and it looks like you spent hours crafting it.
- Perfect texture balance: Creamy white chocolate with chewy marshmallows and crunchy pistachios creates an irresistible mix.
- Versatile and adaptable: You can swap pistachios for other nuts or skip cherries if that’s not your thing.
- Easily giftable: Cut into neat chunks for holiday presents or party favors that feel thoughtful and homemade.
Ingredients & Why They Work
Every ingredient here plays a role in creating that wildly popular rocky road texture and flavor. White chocolate brings sweetness and smoothness, while the toasted pistachios provide that all-important crunch plus a vibrant pop of color. I always recommend quality ingredients—they really transform this treat from good to unforgettable.

- White chocolate melts/discs: Easier to melt evenly than blocks; use good quality for best flavor.
- Grapeseed oil (or neutral oil): Helps the melted chocolate stay smooth and sets softer for easier slicing.
- Marshmallows: Cut most in half to distribute chewiness evenly throughout the rocky road.
- Pistachios: Toast ‘em to heighten flavor and crunch; their green hue makes it visually stunning.
- Glacé cherries: Sweet bursts of red that contrast nicely and add a holiday touch.
- Desiccated coconut: Adds subtle texture and balances sweetness without overwhelming.
Make It Your Way
One of my favorite things about this White Chocolate Rocky Road with Pistachios Recipe is how easy it is to adapt to your own tastes. I sometimes swap pistachios for almonds if I want a different crunch, or add a few chopped dried apricots for a punch of tanginess. Don’t hesitate to get creative—you really can’t go wrong.
- Variation: I once made a batch with dark chocolate instead of white—it brought a richer, more intense flavor but the pistachios kept their lovely crunch, so it’s a great alternative.
- Allergy-friendly swap: Use pumpkin seeds for a nut-free option; just toast them just like you would the pistachios for that satisfying texture.
- Seasonal edition: Swap glacé cherries for dried cranberries during the winter holidays for a tart bite that brightens the mix.
Step-by-Step: How I Make White Chocolate Rocky Road with Pistachios Recipe

Step 1: Prepare Your Pan and Ingredients
I always start by lightly greasing an 8-inch square pan with butter. Then, I line it with parchment paper, leaving some overhang on the sides. This little trick makes lifting out the rocky road so much easier later on. While you do that, set aside a handful of the nicest glacé cherries and chop about a tablespoon of pistachios finely. These go on top for a beautiful finish. It feels like setting the stage for something special.
Step 2: Melt Chocolate Smoothly
Pop the white chocolate and grapeseed oil into a heatproof bowl. I prefer using the microwave for this—set it to 30-second bursts and stir well in between. This stops the chocolate from seizing up or burning. You’re aiming for a silky, glossy texture that’s easy to work with.
Step 3: Fold in the Goodies
Once your chocolate is perfectly melted, gently fold in those halved marshmallows, toasted pistachios, glacé cherries, and desiccated coconut. I always make sure everything’s well coated—this is where the magic happens, as every bite will have just the right mix of textures and flavors.
Step 4: Pour, Level, and Add Toppings
Pour your mixture into the prepared pan. I like to spread it out evenly with a spatula, then give the pan a firm bang and a good shake. This isn’t just satisfying—it helps settle everything down nicely so your rocky road sets with a smooth, flat top. Then sprinkle the reserved cherries and chopped pistachios on top—it makes such a pretty finishing touch!
Step 5: Chill and Slice
Pop the pan in the fridge and let it set for at least three hours. When it’s firm to the touch, lift it out using the parchment overhang. I like to cut mine into neat rows first, then into chunks of different sizes depending on whether I’m snacking or gifting. Pro tip: use a sharp knife warmed under hot water for cleaner cuts.
Top Tip
I’ve made rocky road many times—and over time, these tips have saved me a bunch of frustration and turned out better batches every single time. They might just change your rocky road game, too!
- Controlled melting: Take your time melting the chocolate in short bursts to avoid scorching—it’s key to that smooth texture.
- Toast those nuts: I can’t emphasize enough how much toasting pistachios boosts their flavor and crunchiness.
- Use parchment overhang: This simple step makes removing your rocky road from the pan effortless without losing any chunks.
- Warm your knife before cutting: A warm blade slices cleanly without crumbly edges, keeping chunks pretty and neat.
How to Serve White Chocolate Rocky Road with Pistachios Recipe

Garnishes
I love scattering a few extra chopped pistachios and a handful of mini marshmallows on top right before serving for added texture and visual appeal. Sometimes I’ll even dust with a pinch of edible glitter if I’m making it for a party. It’s simple, but those little touches really elevate the presentation.
Side Dishes
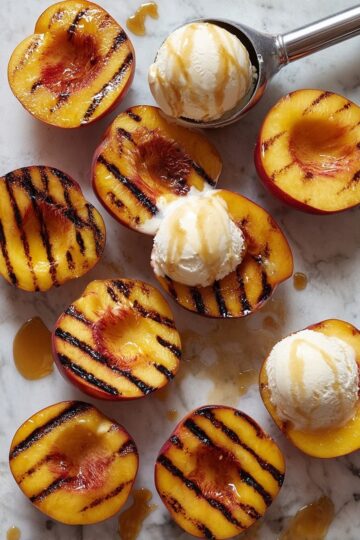
This rocky road pairs perfectly with a cup of strong black coffee or a chilled glass of milk to balance out the sweetness. For holiday gatherings, I often serve it alongside a cheese board with fruit and nuts or a scoop of vanilla ice cream for a richer treat.
Creative Ways to Present
For festive occasions, try cutting the rocky road into shapes using cookie cutters—stars or hearts work beautifully. Wrapping small stacks in parchment paper tied with twine also makes adorable homemade gifts that people always appreciate. Turning it into bark with a sprinkle of crushed candy canes is another fun twist I’ve enjoyed.
Make Ahead and Storage
Storing Leftovers
I store leftover rocky road in an airtight container in a cool, dry place. If it’s particularly hot, the fridge is best to stop it from melting. Just be sure to let it come to room temperature before serving to soften the texture and let the flavors shine.
Freezing
I’ve successfully frozen white chocolate rocky road several times. Wrap pieces individually in plastic wrap and store them in a freezer-safe container or bag. When you want a treat, just thaw briefly at room temperature. The texture stays surprisingly good—like they’re fresh out of the fridge.
Reheating
Reheating isn’t usually necessary, but if your rocky road gets too firm straight from the fridge, I gently warm slices in a low-temp oven for just a minute or so. This softens them without melting the chocolate completely—always keep a close eye to avoid mess!
Frequently Asked Questions:
Absolutely! While the white chocolate gives this recipe its signature creamy sweetness, swapping in milk or dark chocolate works well too and caters to your personal preference. Just adjust the amount of oil slightly if needed, as different chocolates melt at different rates.
Adding grapeseed oil helps keep the melted chocolate smoother and a bit runnier, making it easier to coat all the mix-ins evenly. It also helps the chocolate set softer, which means your rocky road isn’t rock hard and is easier to cut without cracking.
Definitely! To make a nut-free version of this White Chocolate Rocky Road with Pistachios Recipe, replace pistachios with toasted pumpkin or sunflower seeds. The toasting process still gives you a crunchy texture without any allergens.
If stored in an airtight container in a cool, dry place, this rocky road will keep for up to two weeks. In hotter climates, refrigeration is best. Always allow it to come to room temperature before eating for the best flavor and texture.
Final Thoughts
Making this White Chocolate Rocky Road with Pistachios Recipe always takes me back to cozy afternoons spent chatting with friends and sharing sweet treats. It’s one of those feel-good desserts that’s easy enough for every day but special enough to serve at celebrations. Trust me, once you try this one, it will become a go-to in your treat repertoire too!
Print
White Chocolate Rocky Road with Pistachios Recipe
- Prep Time: 15 minutes
- Cook Time: 0 minutes
- Total Time: 3 hours 15 minutes
- Yield: 20 servings
- Category: Dessert
- Method: No-Cook
- Cuisine: Australian
- Diet: Vegetarian
Description
White Christmas Rocky Road is a festive no-bake treat combining smooth white chocolate with marshmallows, toasted pistachios, glacé cherries, and desiccated coconut. This easy-to-make candy is perfect for gifting or enjoying as a sweet holiday snack.
Ingredients
Main Ingredients
- 500 g white chocolate melts/discs (or chips or chopped block)
- 2 tablespoon grapeseed oil (or other neutral-flavored oil)
Add-ins
- 2 ½ cups marshmallows, mostly cut in half
- 1 cup unsalted pistachios, toasted
- 1 cup glacé cherries
- ½ cup unsweetened desiccated coconut (or finely shredded, not flakes)
Instructions
- Prepare Pan: Lightly grease a 20cm (8") square pan with butter, then line it with baking paper leaving an overhang for easy removal later.
- Reserve Toppings: Set aside about 8 of the nicest glacé cherries for topping and finely chop 1 tablespoon of the pistachios.
- Melt Chocolate: Place the white chocolate and grapeseed oil in a heatproof bowl. Microwave in 30-second increments, stirring between each, until the mixture is melted and smooth.
- Add Mix-ins: Stir in marshmallows, toasted pistachios, glacé cherries, and desiccated coconut evenly into the melted chocolate. Pour the mixture into the prepared pan and spread it out evenly. Gently bang and shake the pan to level the mixture.
- Top and Chill: Arrange the reserved glacé cherries on top and sprinkle with the chopped pistachios. Refrigerate for 3 hours or until firm.
- Serve: Lift the set rocky road out of the pan using the paper overhang. Cut into 5 lines lengthwise, then slice into chunks for serving or gifting.
Notes
- Chocolate: Milk or dark chocolate can be used as alternatives to white chocolate if preferred.
- Oil: Adding oil makes the melted chocolate smoother and results in a softer set that is easier to cut without cracking; it is optional.
- Pistachios: Toast nuts at 180°C (350°F) for 8 minutes, shaking the tray once, to enhance flavor and crunch. Other nuts like almonds can also be used.
- Storage: Store in a cool, dry place for up to a couple of weeks or refrigerate if it's very warm.
Nutrition
- Serving Size: 1 piece
- Calories: 180 kcal
- Sugar: 15 g
- Sodium: 25 mg
- Fat: 12 g
- Saturated Fat: 7 g
- Unsaturated Fat: 4 g
- Trans Fat: 0 g
- Carbohydrates: 18 g
- Fiber: 1 g
- Protein: 2 g
- Cholesterol: 10 mg


Leave a Reply